
Tested on 27 September 2026 with a Hostinger KVM 2 VPS and Hostinger’s DeepSeek Harness template (Harness 0.1.1-rc.2).
I earn a commission if you buy Hostinger through the link in my YouTube video’s description. It doesn’t change your price.
DeepSeek Harness is a free, open-source AI agent. In this guide I put it on my own Hostinger server, so it runs 24/7, even with my laptop closed. You’ll buy the server, open Harness, fix the 502 Bad Gateway error that Hostinger’s one-click template gives right now, connect OpenRouter so you can use almost any AI model, and have Harness build and publish a website from one prompt.
It takes about 10 minutes, and everything the AI did in my test cost about three cents. Got a 502? Jump to the fix.
What you need
- A Hostinger VPS with the DeepSeek Harness template. I use Hostinger’s KVM 2: 2 CPU cores, 8 GB of memory and 100 GB of storage. It’s from US$8.99 a month on the 24-month plan (checked 3 October 2026).
- About US$10 of OpenRouter credit, or a DeepSeek API key if you already have one.
- About 10 minutes, plus a few minutes while Hostinger builds the server.
In this guide
- Buy the Hostinger VPS with the DeepSeek Harness template
- Set up the server
- Open DeepSeek Harness
- Fix the 502 Bad Gateway error
- Get an OpenRouter API key
- Connect OpenRouter to Harness
- Pick a model and test it
- Add a model Harness doesn’t list yet
- Have Harness build and publish a website
- What it costs
Step 1: Buy the Hostinger VPS with the DeepSeek Harness template
A VPS is a server you rent that runs all the time. Hostinger has a DeepSeek Harness template that installs Harness for you, so there’s nothing to set up by hand.
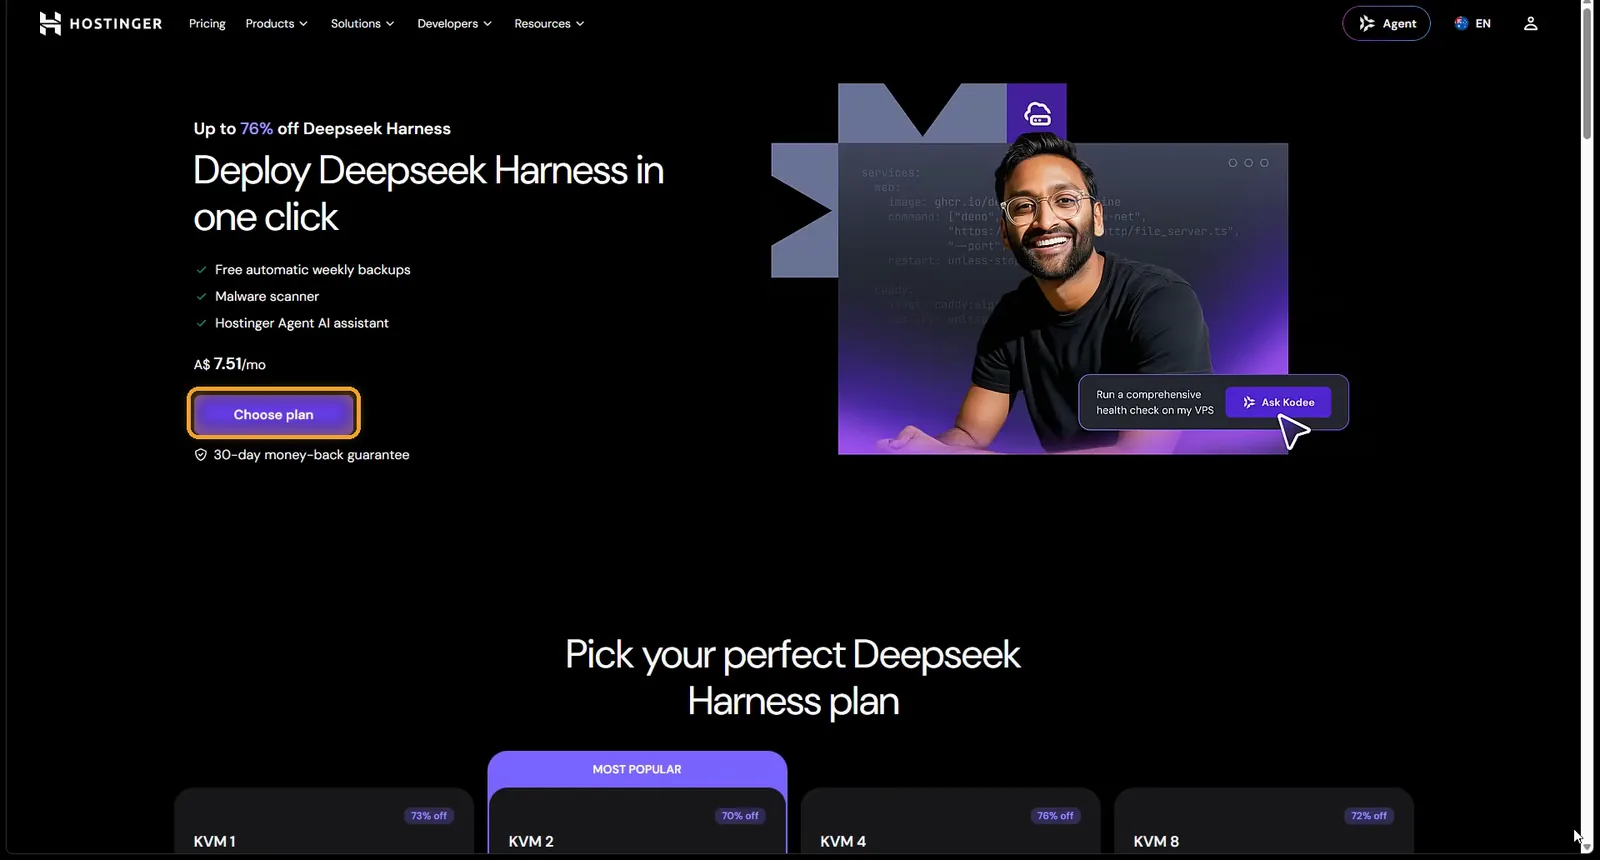
Open Hostinger’s DeepSeek Harness page and scroll down to the plans.
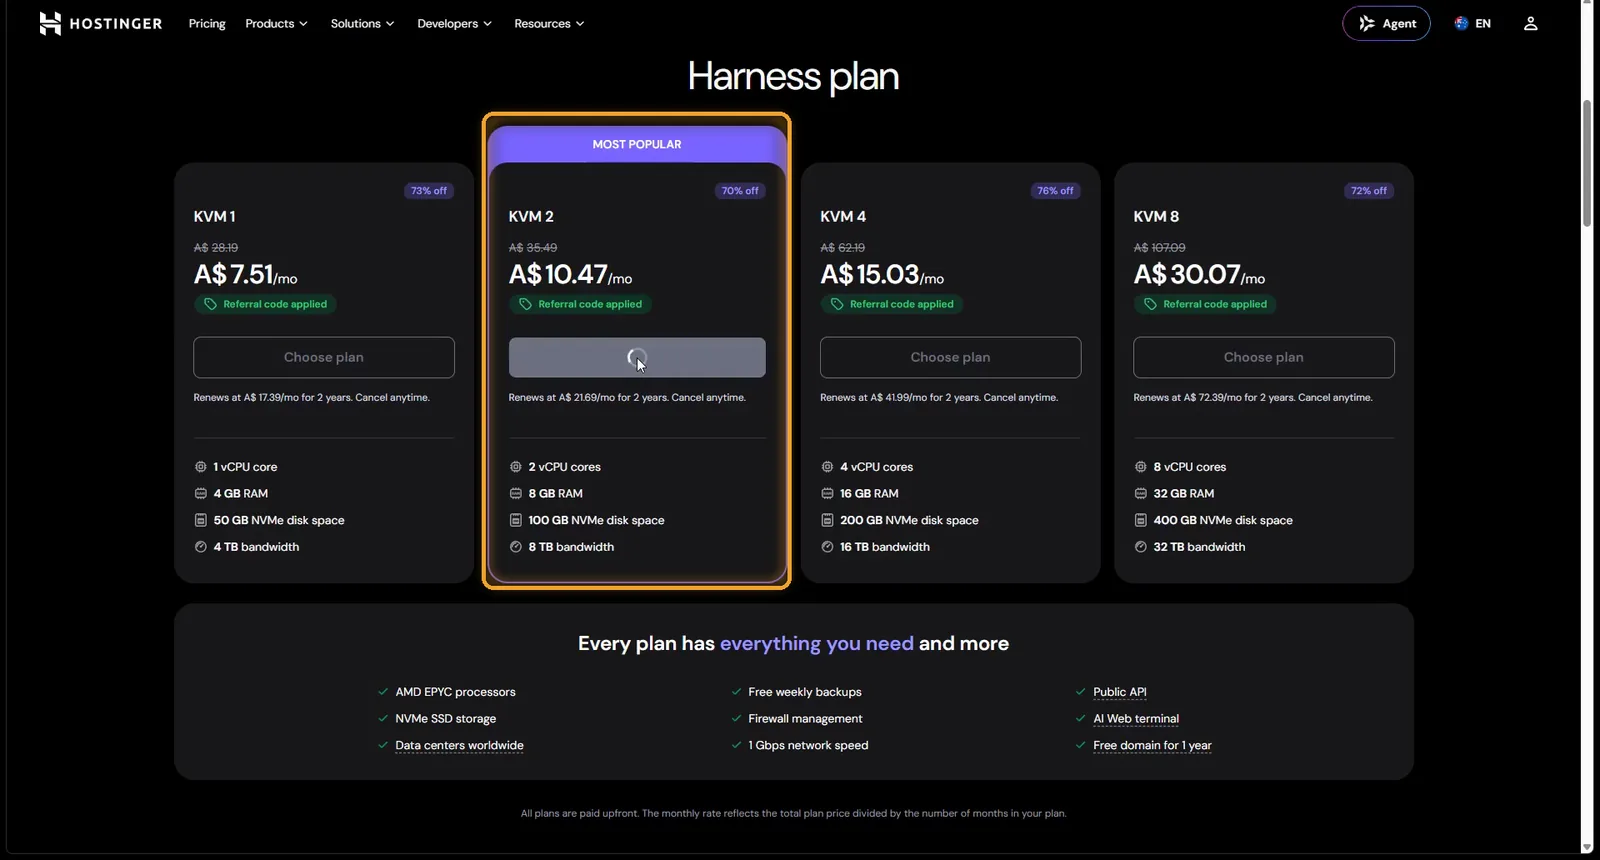
KVM 2 is the one to get. It has plenty of power and space for the agent and anything it builds. Click Choose plan on it.
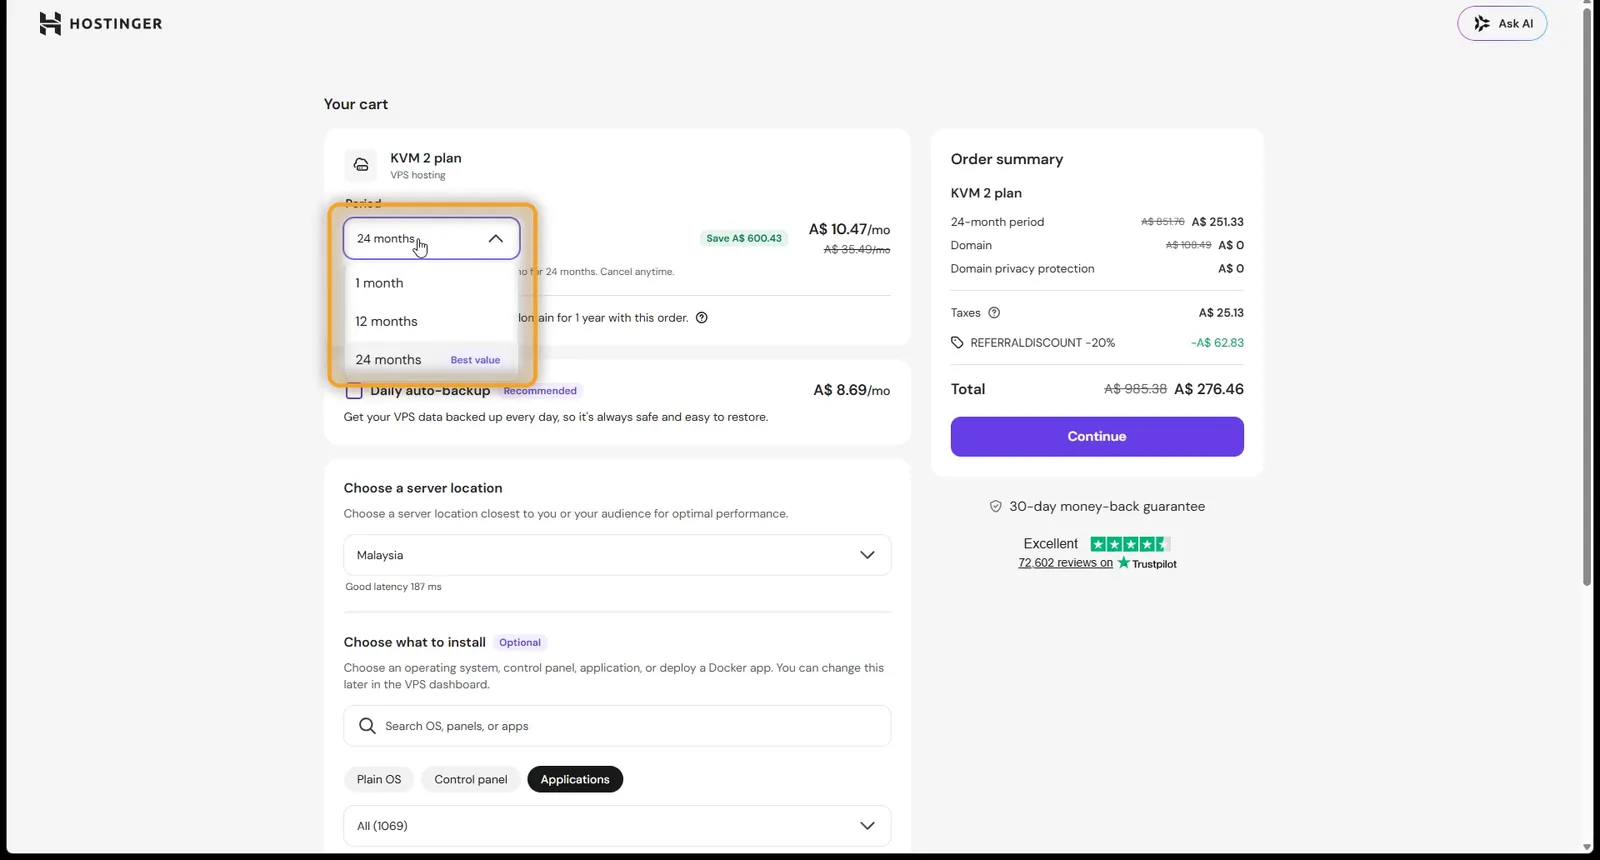
In the cart, pick your term. 24 months is the cheapest per month, and 12 months is a good middle ground.
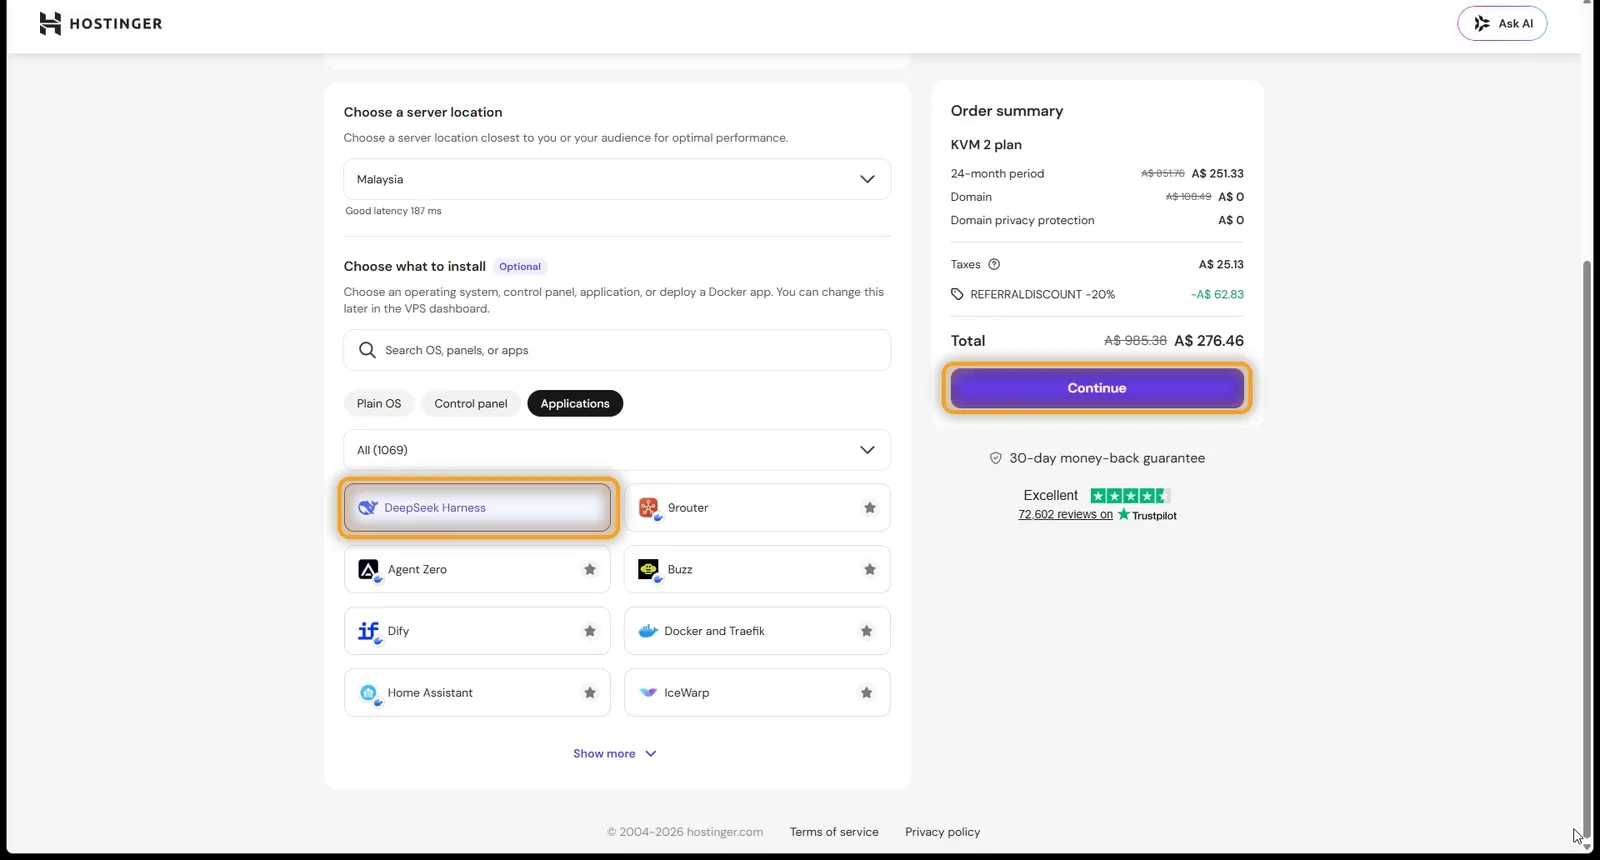
Under Choose what to install, make sure DeepSeek Harness is selected under Applications. Then click Continue and pay.
| KVM 2 with DeepSeek Harness | Price |
|---|---|
| Monthly price, 24-month plan | US$8.99 (A$13.09 in Australia) |
| Paid upfront for 24 months | About US$216 (A$314), plus any tax |
| Renews at | US$14.99 a month (A$21.69) |
| What you get | 2 CPU cores, 8 GB memory, 100 GB NVMe storage, 8 TB bandwidth |
| Money-back guarantee | 30 days |
Step 2: Set up the server
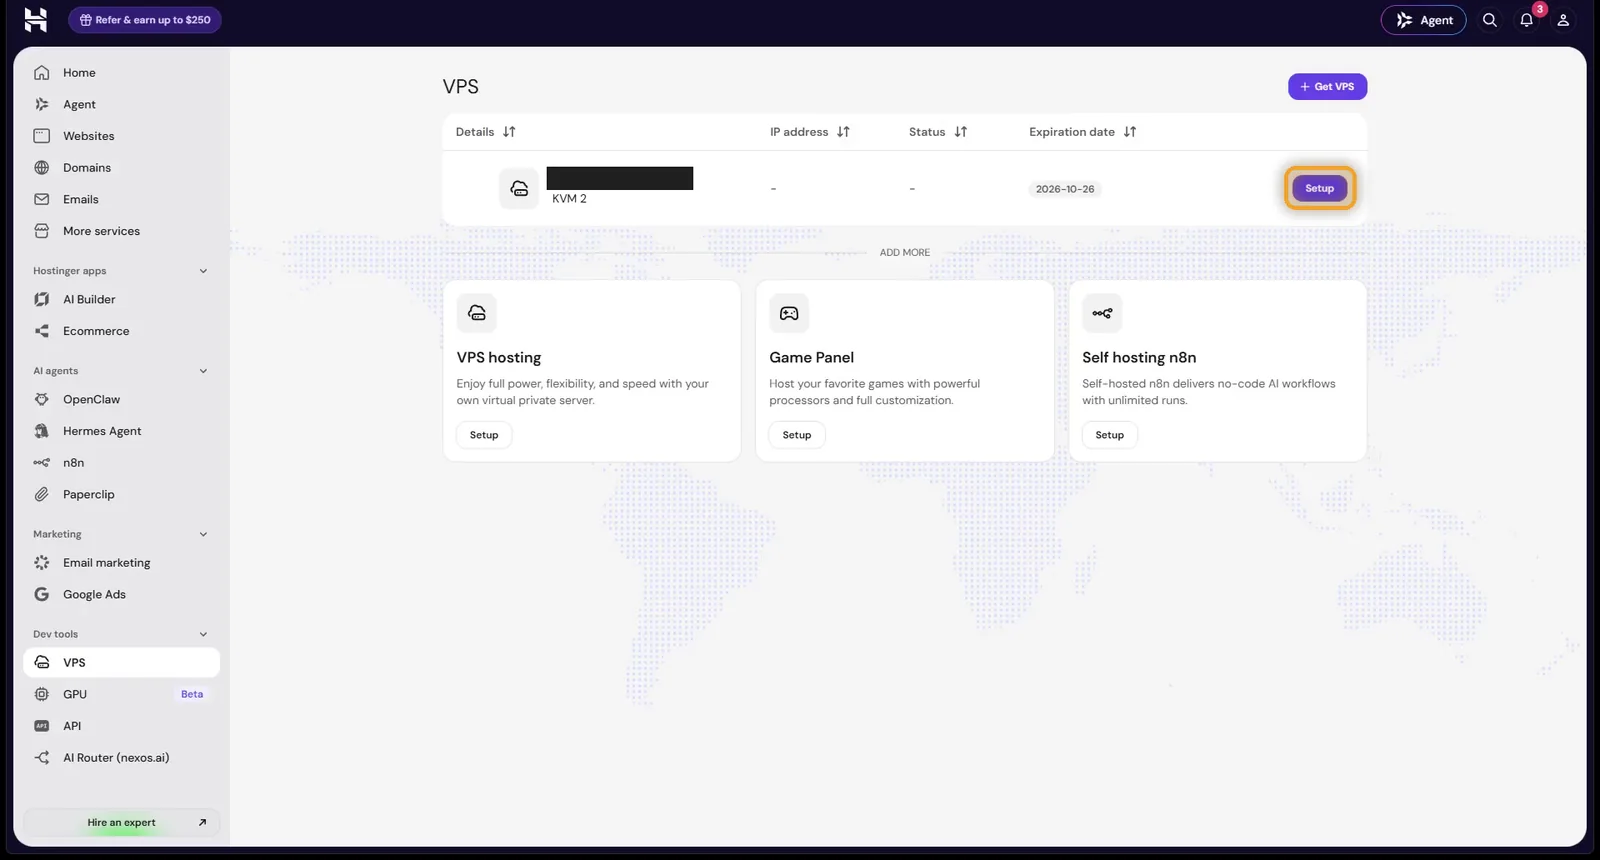
After you pay, Hostinger walks you through the setup. If it doesn’t open on its own, go to VPS in hPanel and click Setup next to your new server.
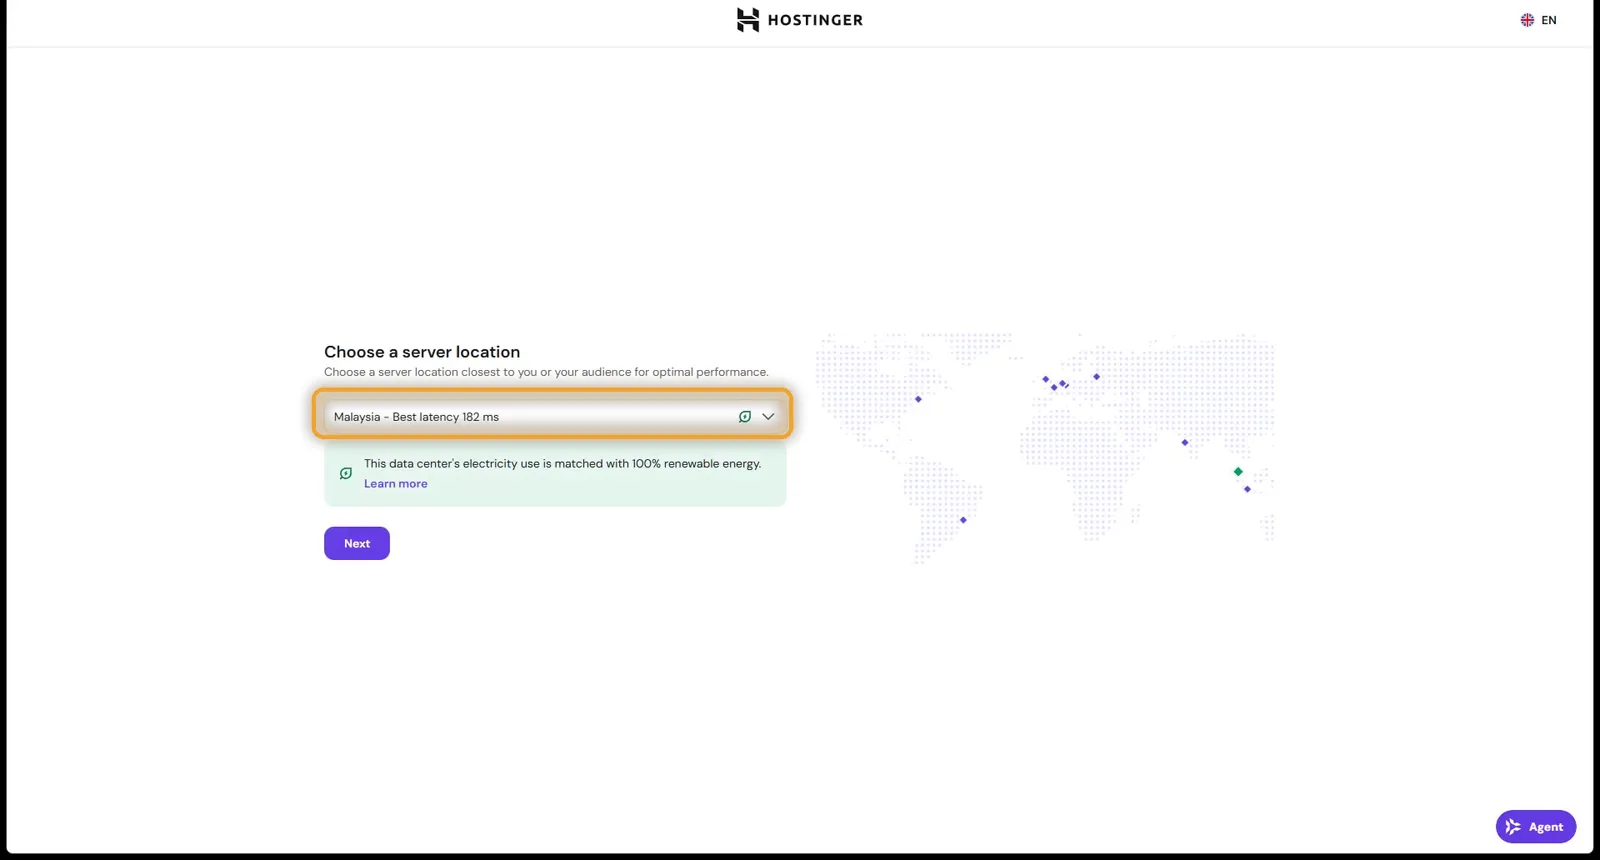
Pick the location marked Best latency. That’s the data centre that answers you fastest.
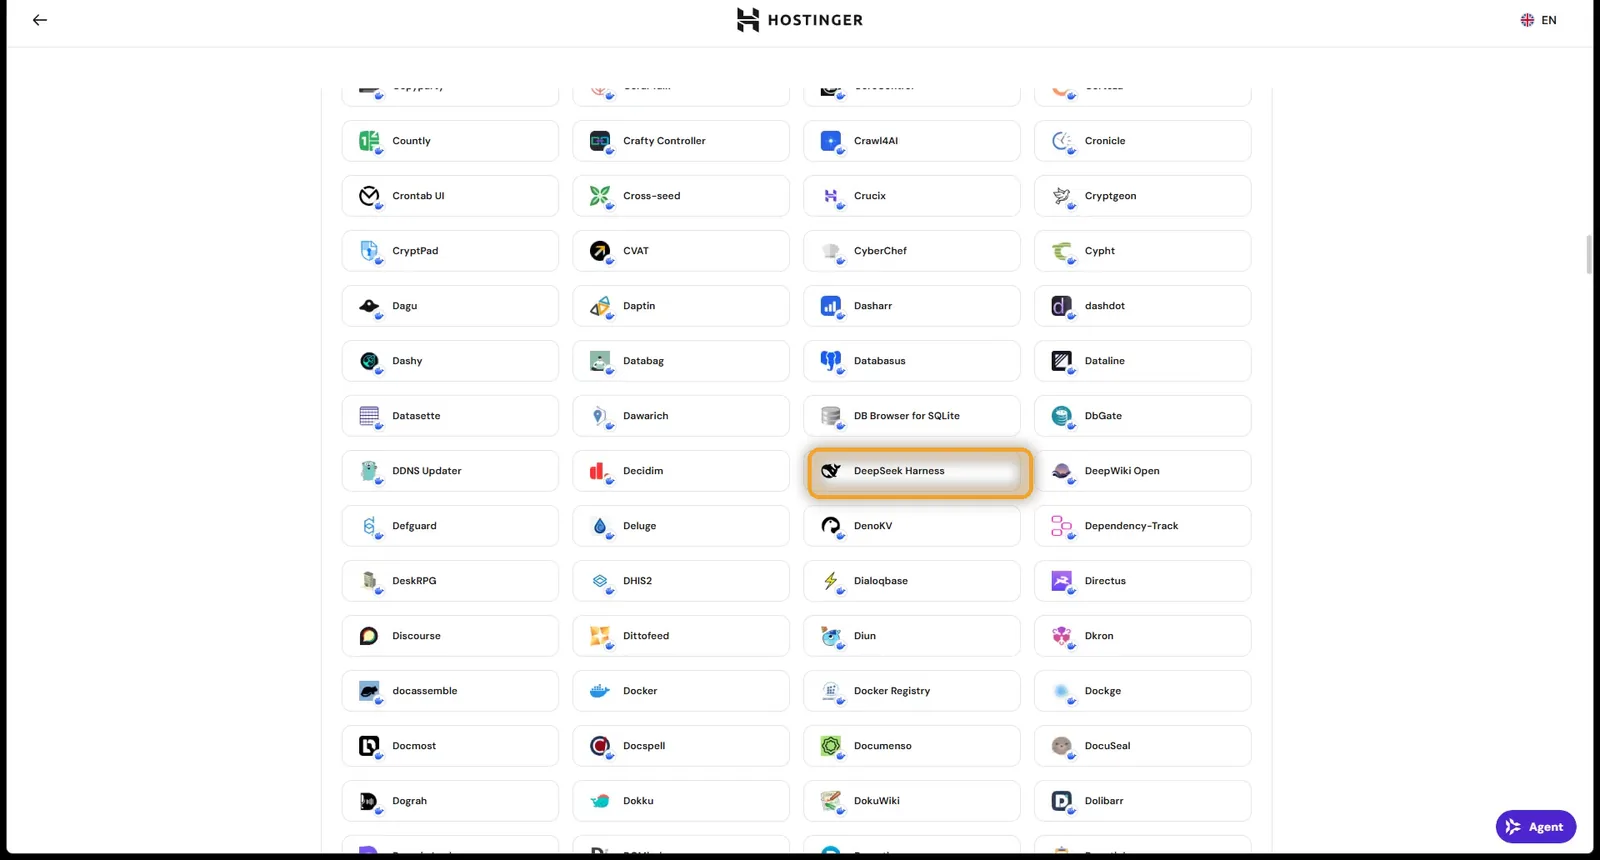
It asks what to install again. Switch to Applications, pick DeepSeek Harness and click Select.
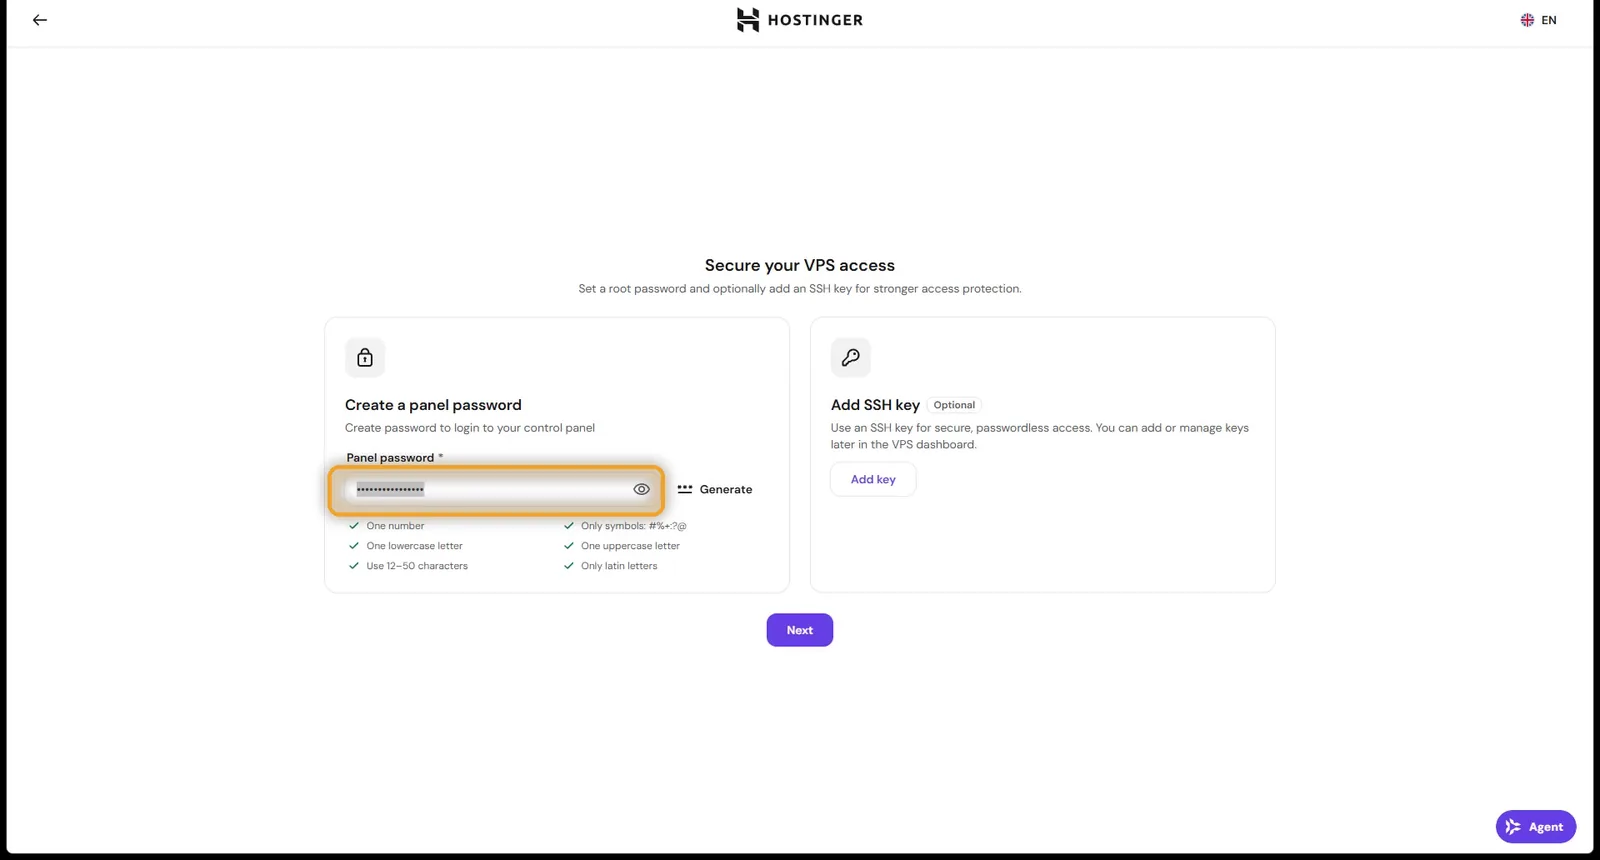
Set a panel password and write it down. It’s your login to Harness in a minute.
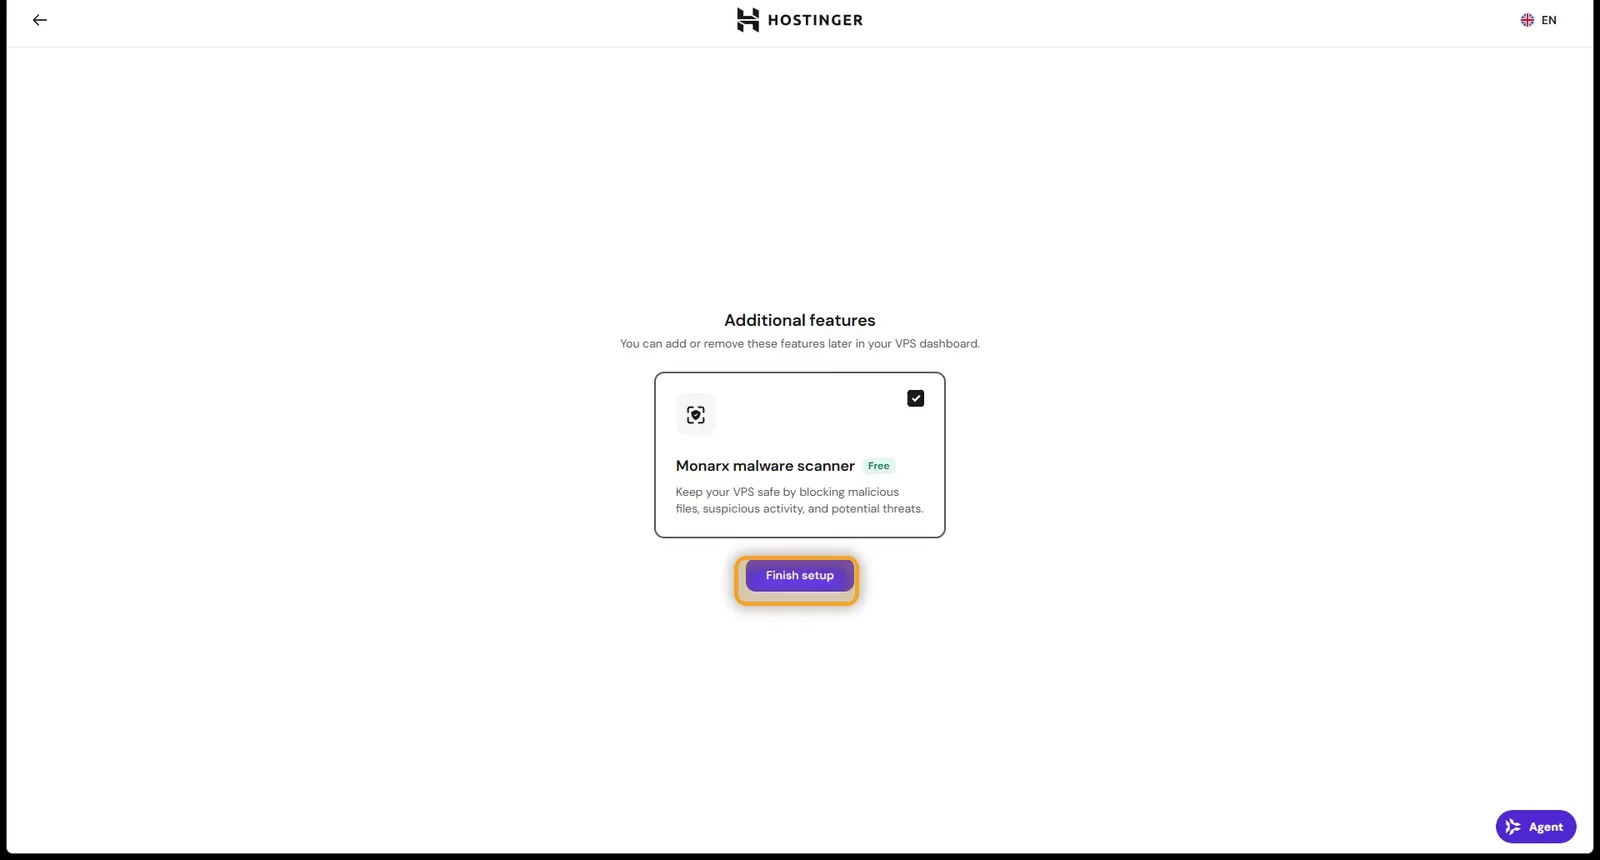
Add the free malware scanner if you want it, and click Finish setup. Hostinger builds the server and installs Harness for you. It takes a few minutes.
Step 3: Open DeepSeek Harness
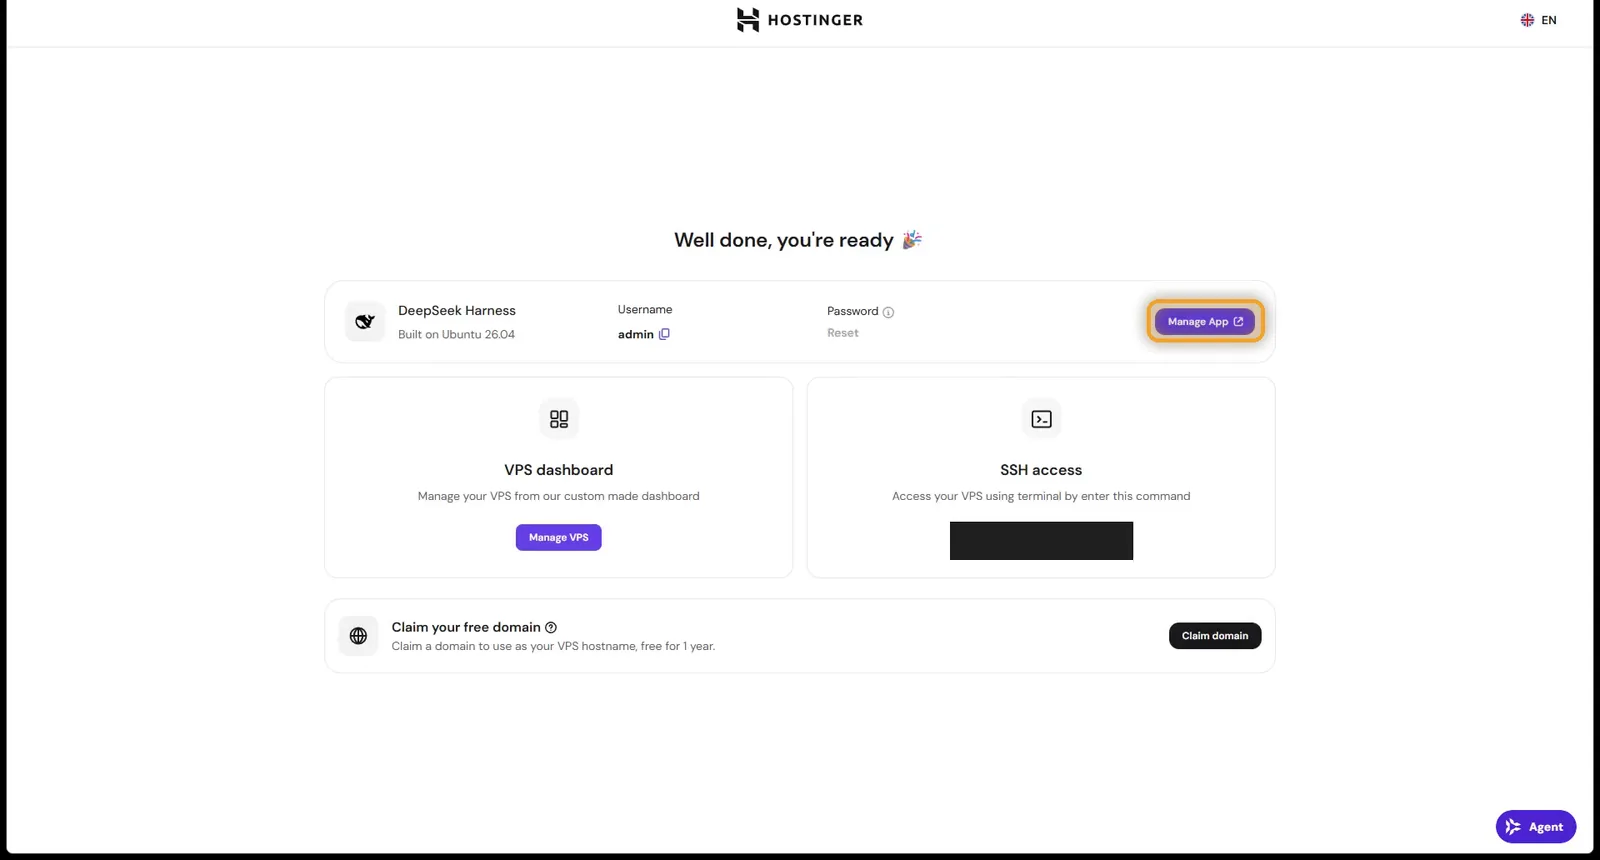
When it’s done, you land on the Well done, you’re ready page. Click Manage App. You can also find it any time on your VPS dashboard: VPS, then Manage, then Manage App.
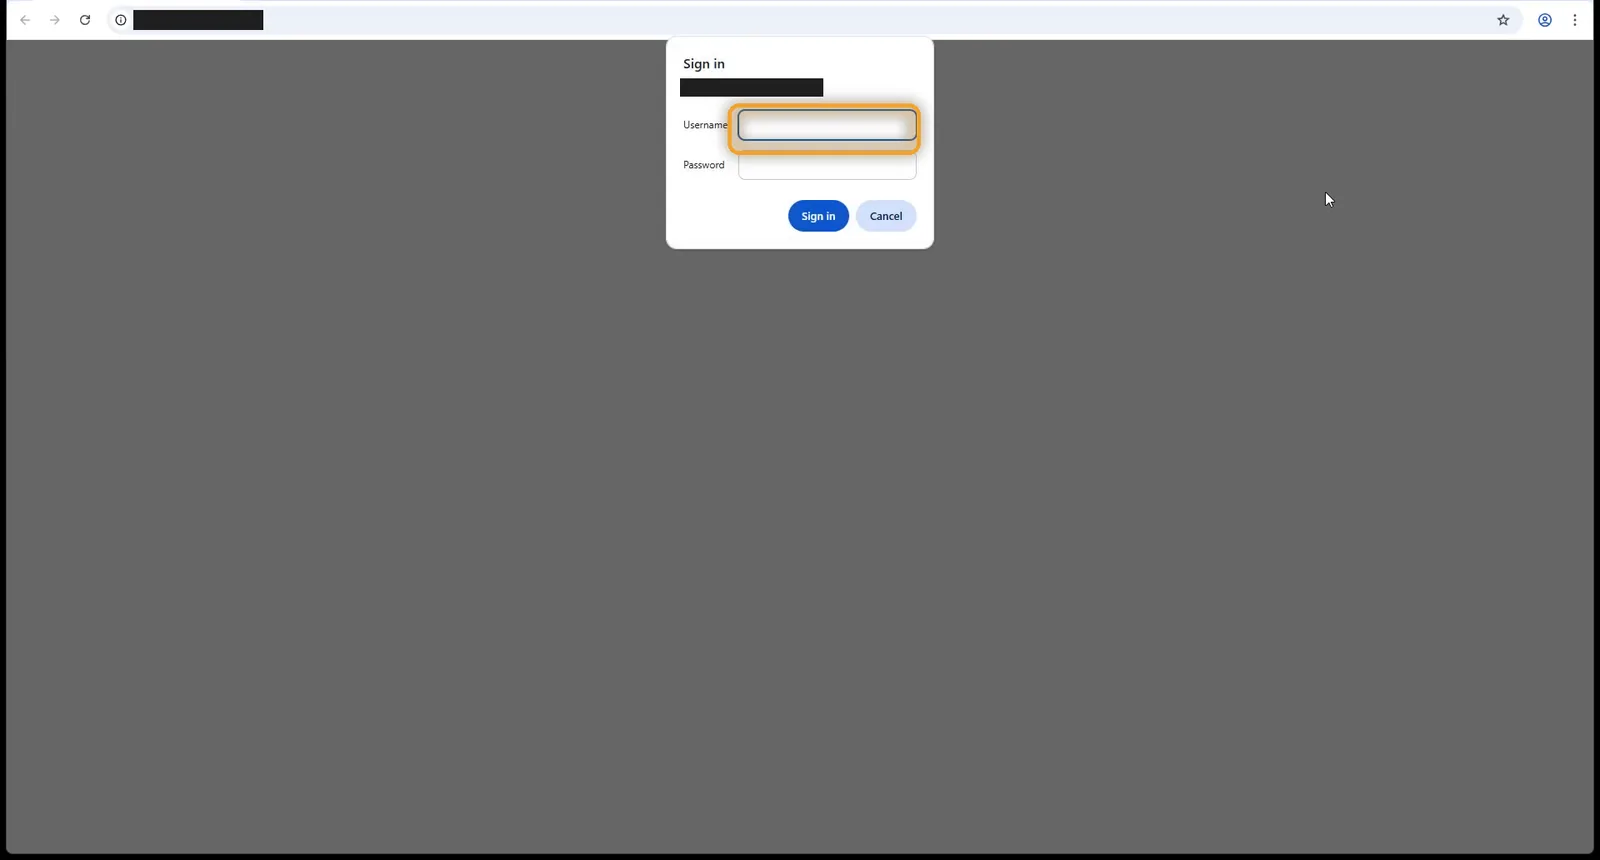
A sign-in box pops up. The username is admin, and the password is the panel password you just set.
If Harness opens, skip to Step 4. If you see 502 Bad Gateway, it’s not you. Do the fix below first.
How to fix the 502 Bad Gateway error on DeepSeek Harness
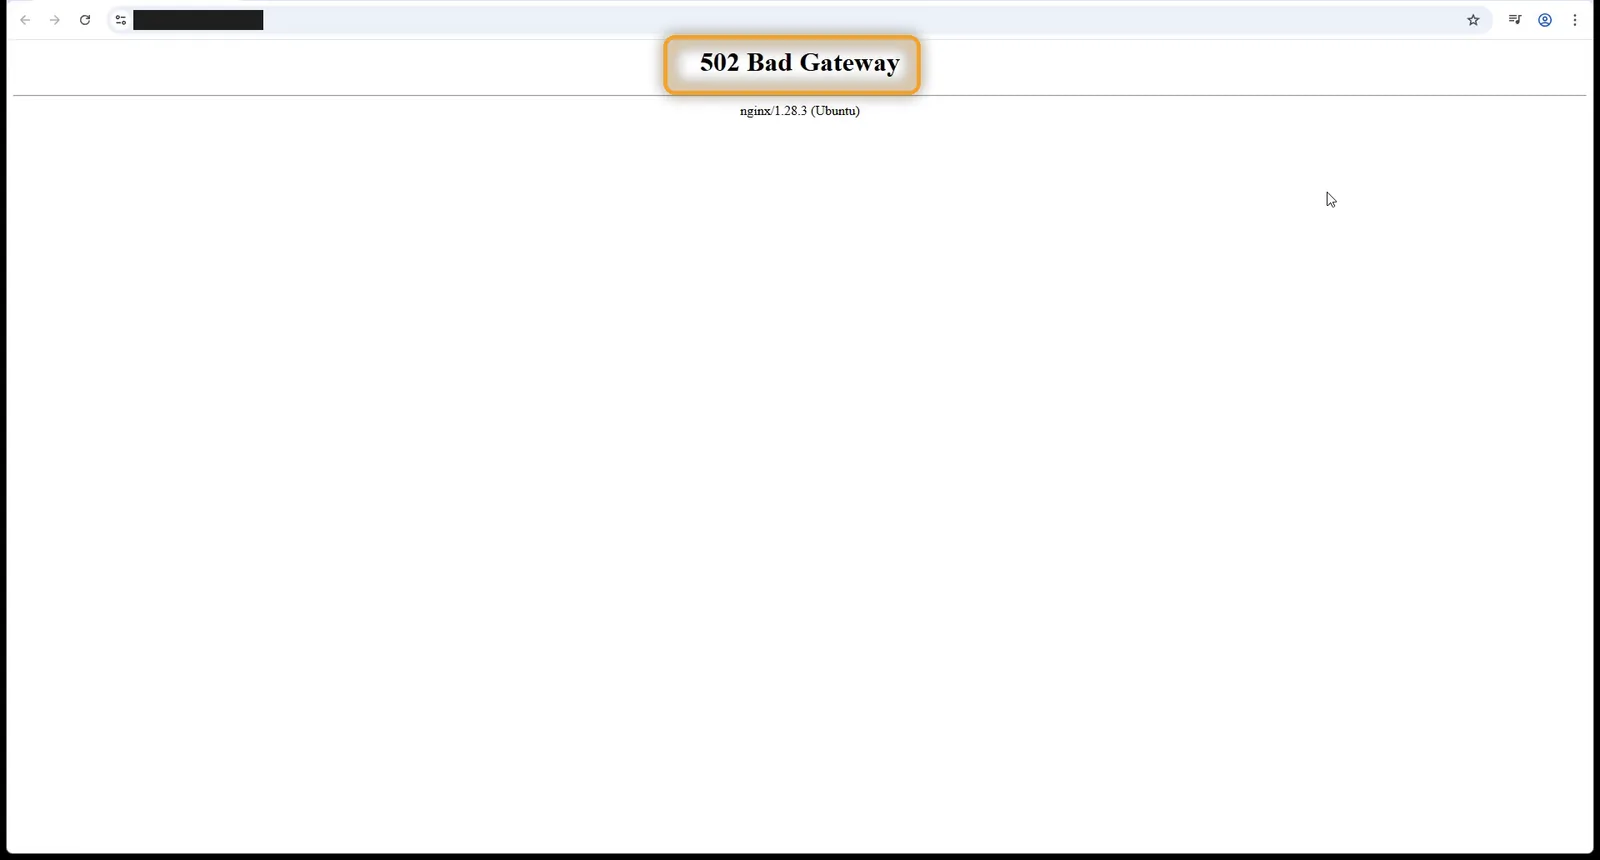
Why it happens: the template installs Harness 0.1.1-rc.2. A recent update to some of the parts it’s built on breaks that version, so the app never starts. The web server in front of it has nothing to hand your visit to, so it shows 502.
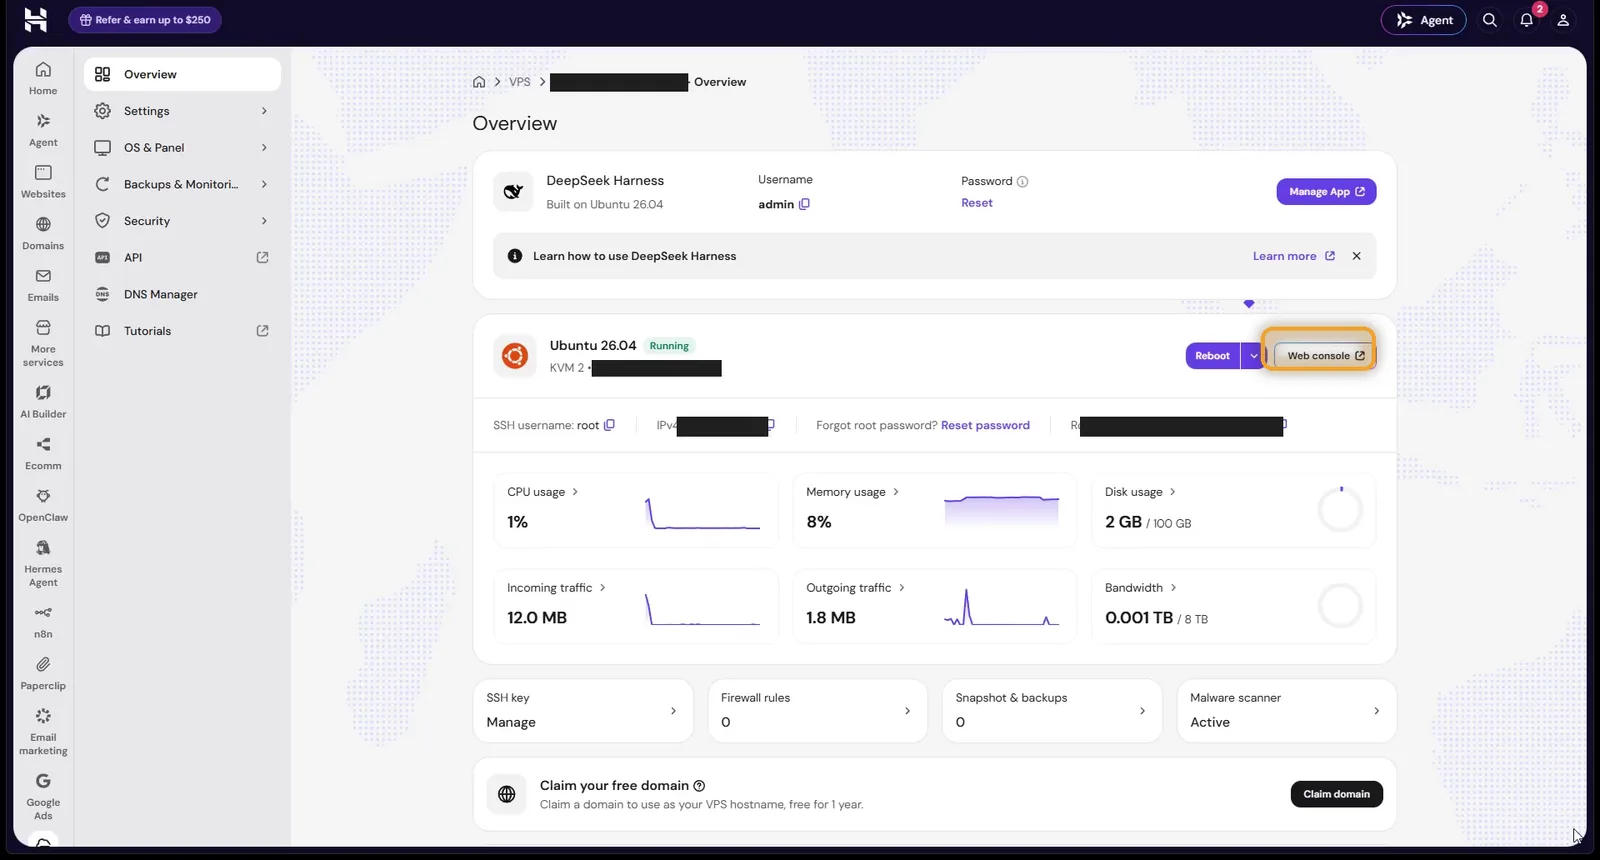
The fix is one line. Back on your VPS dashboard in hPanel, click Web console. That’s a command window in your browser.
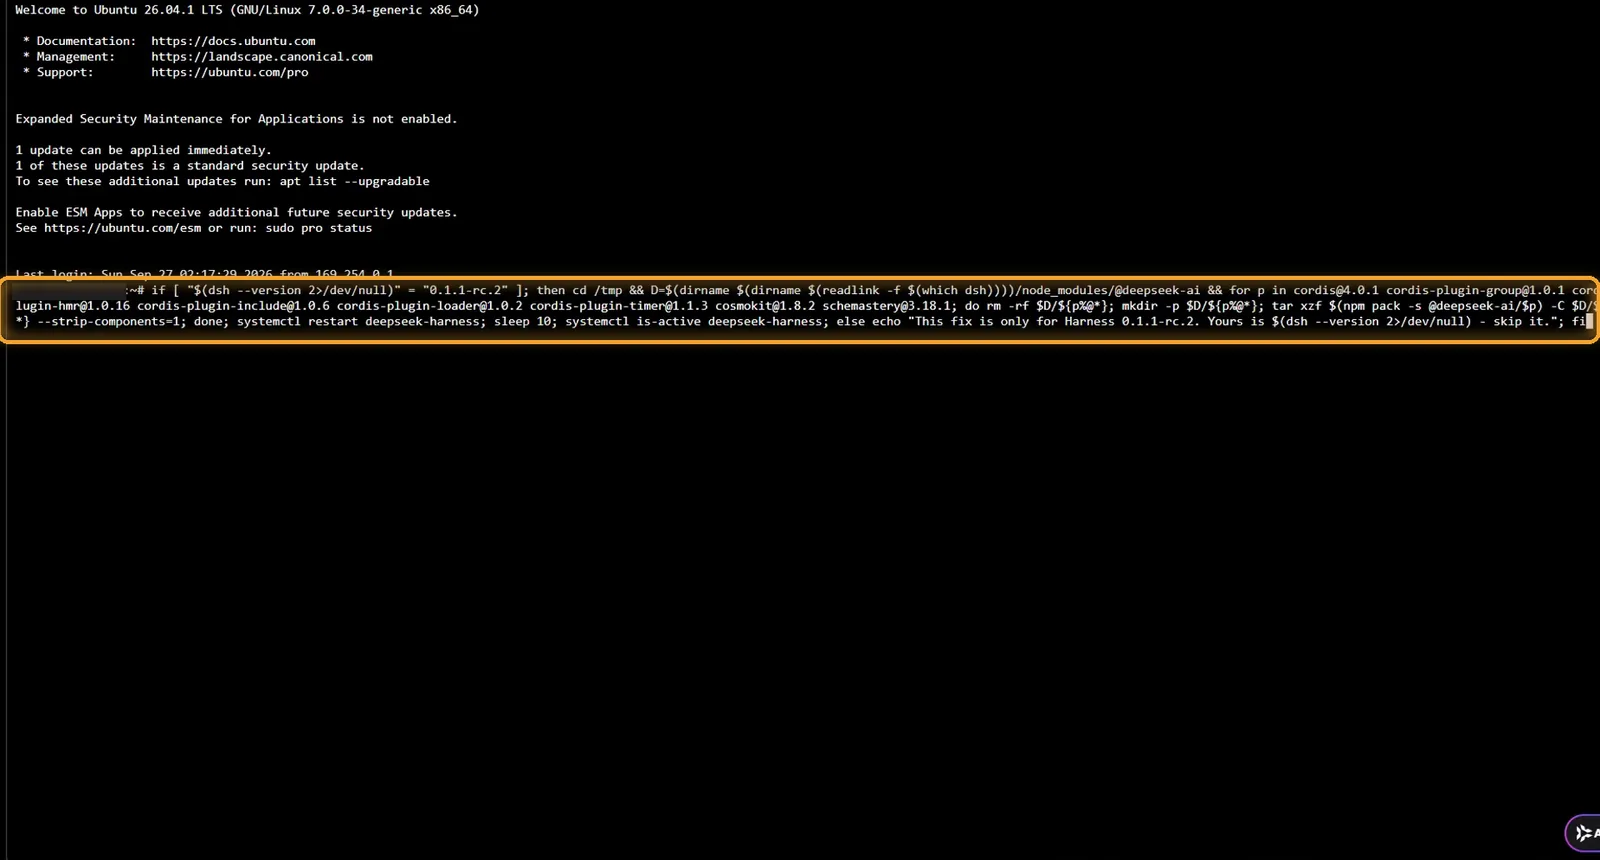
Paste this line and press Enter:
if [ "$(dsh --version 2>/dev/null)" = "0.1.1-rc.2" ]; then cd /tmp && D=$(dirname $(dirname $(readlink -f $(which dsh))))/node_modules/@deepseek-ai && for p in cordis@4.0.1 cordis-plugin-group@1.0.1 cordis-plugin-hmr@1.0.16 cordis-plugin-include@1.0.6 cordis-plugin-loader@1.0.2 cordis-plugin-timer@1.1.3 cosmokit@1.8.2 schemastery@3.18.1; do rm -rf $D/${p%@*}; mkdir -p $D/${p%@*}; tar xzf $(npm pack -s @deepseek-ai/$p) -C $D/${p%@*} --strip-components=1; done; systemctl restart deepseek-harness; sleep 10; systemctl is-active deepseek-harness; else echo "This fix is only for Harness 0.1.1-rc.2. Yours is $(dsh --version 2>/dev/null) - skip it."; fiIt checks your version first, so it only changes anything if you have the broken one.
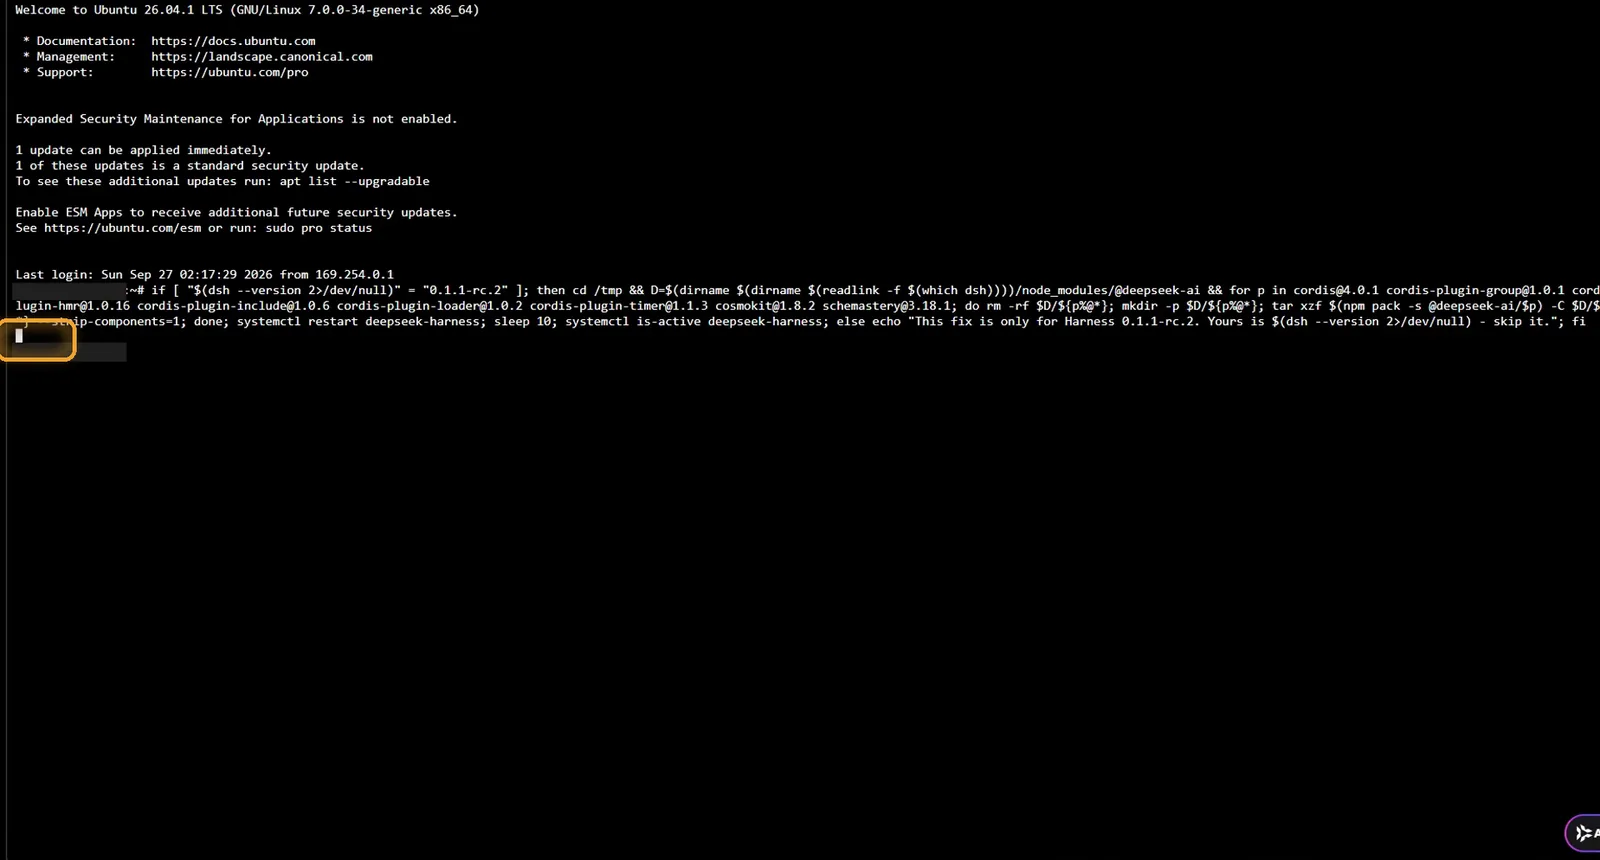
After about 15 seconds, it prints active. Click Manage App again.
Still 502? Wait 30 seconds and reload, because Harness takes a moment to start. If the line printed “This fix is only for Harness 0.1.1-rc.2”, Hostinger has changed the template. Skip the fix, and tell me in the comments on the video which version it showed.
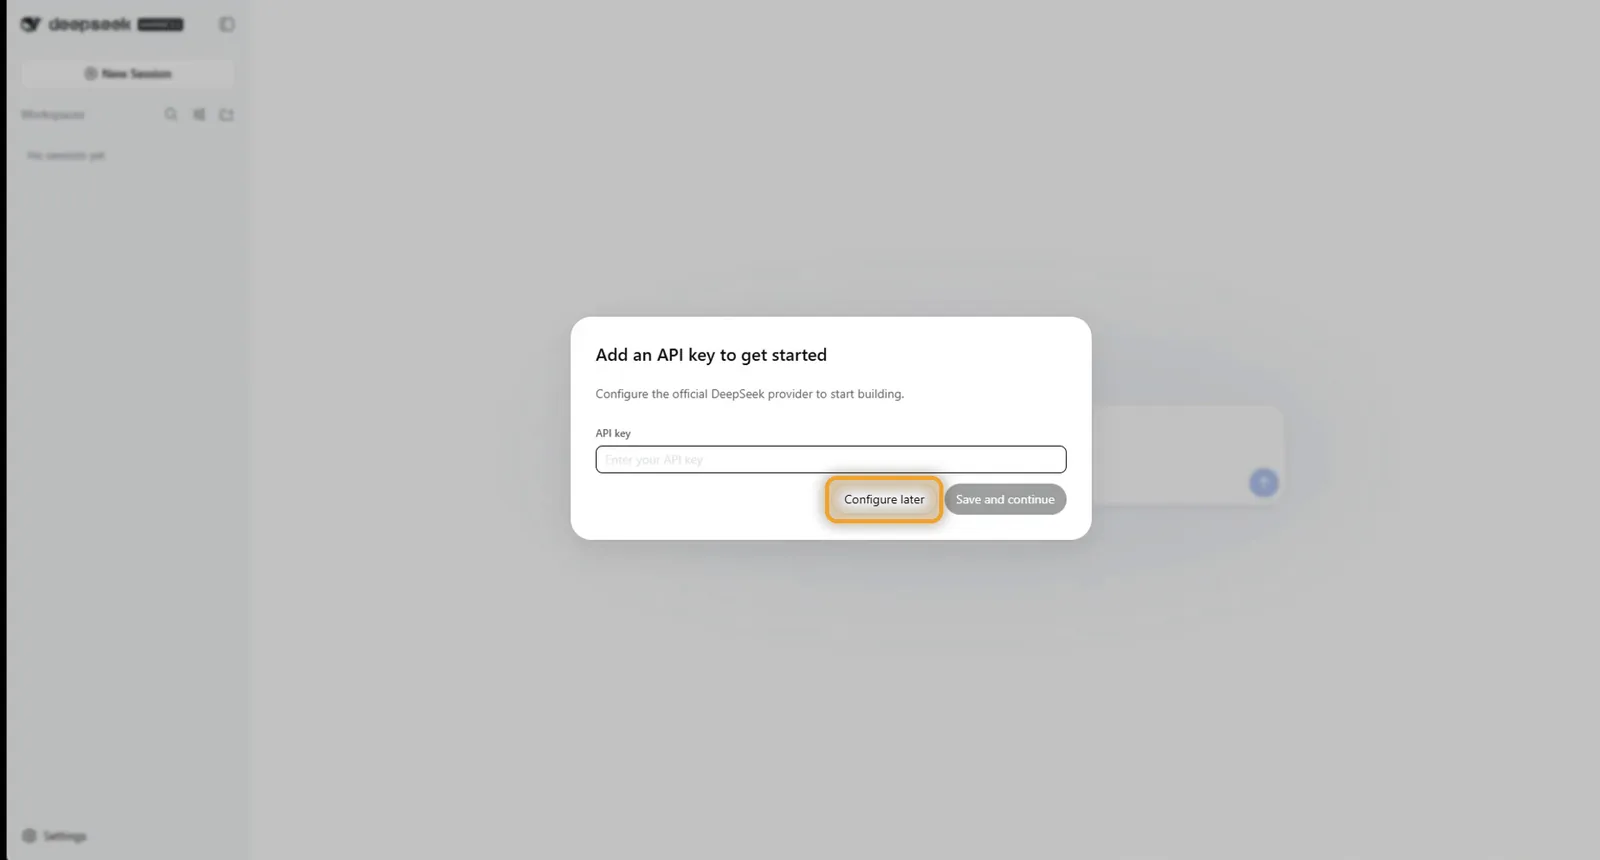
Harness then shows a testing notice, because it’s still in testing. Click Continue. Next it asks for a DeepSeek API key: a password that lets Harness use your DeepSeek account. Already have one? Paste it in and skip to Step 6. I use OpenRouter instead, so I click Configure later.
Step 4: Get an OpenRouter API key
OpenRouter gives you one key for hundreds of AI models, and you can switch between them any time.
On the OpenRouter website, open Credits and add a few dollars. US$10 is plenty, and you’ll see a small fee and tax on top.
Then go to API Keys and click New Key. Give it a name, pick an expiry and set a credit limit. I use $5, so once this key has spent $5 it stops working. Click Create and copy the key.
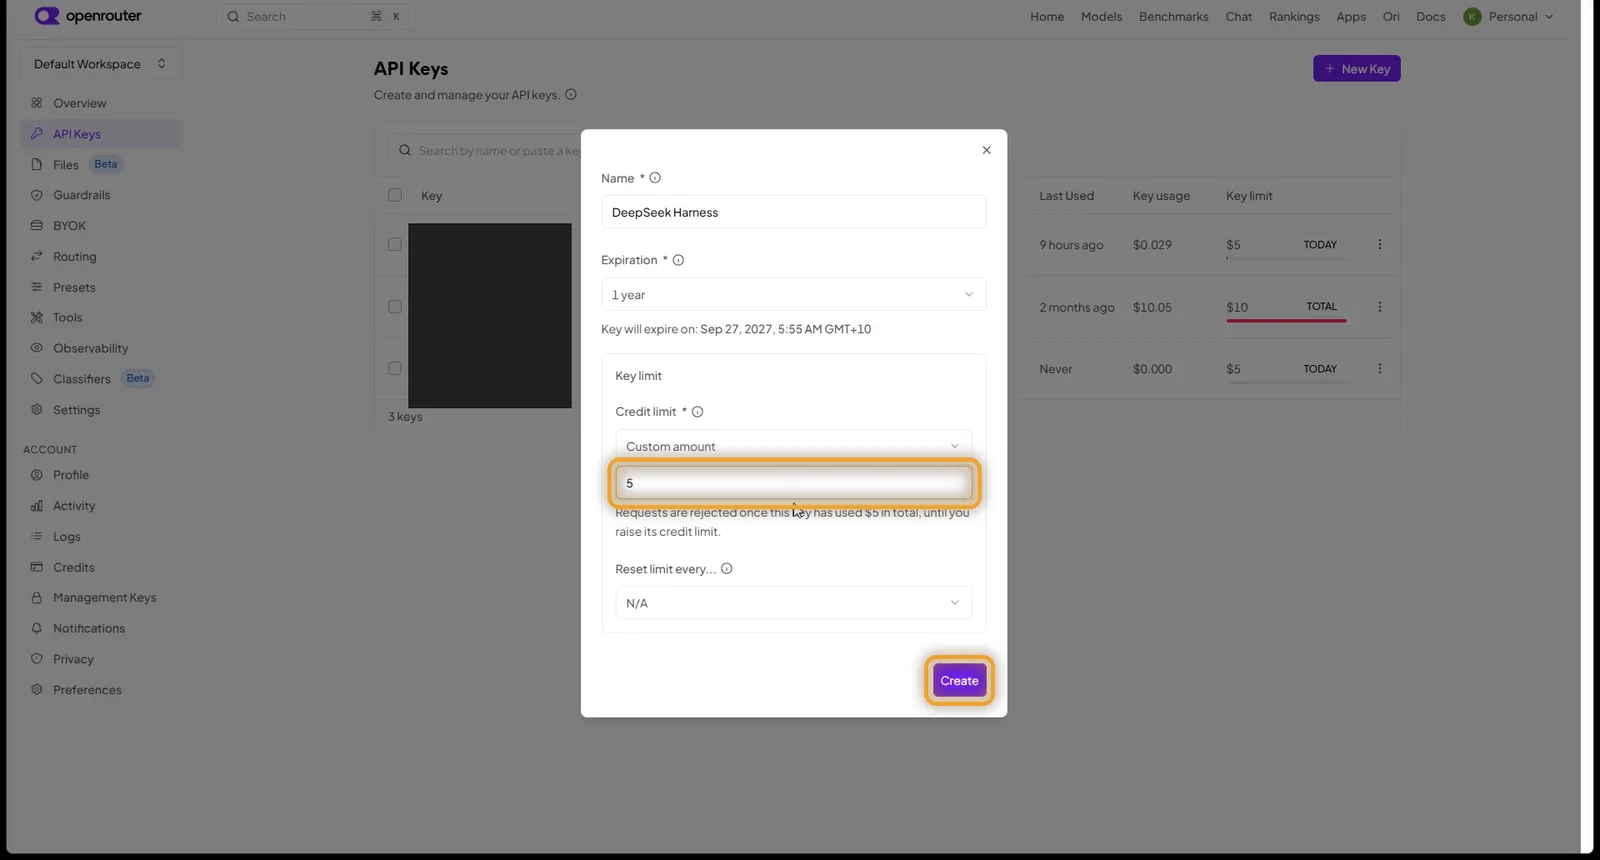
Keep the key private. Anything it’s used for is billed to your account.
Step 5: Connect OpenRouter to Harness
Back in Harness, click Settings in the bottom-left corner, then Models, then Add provider.
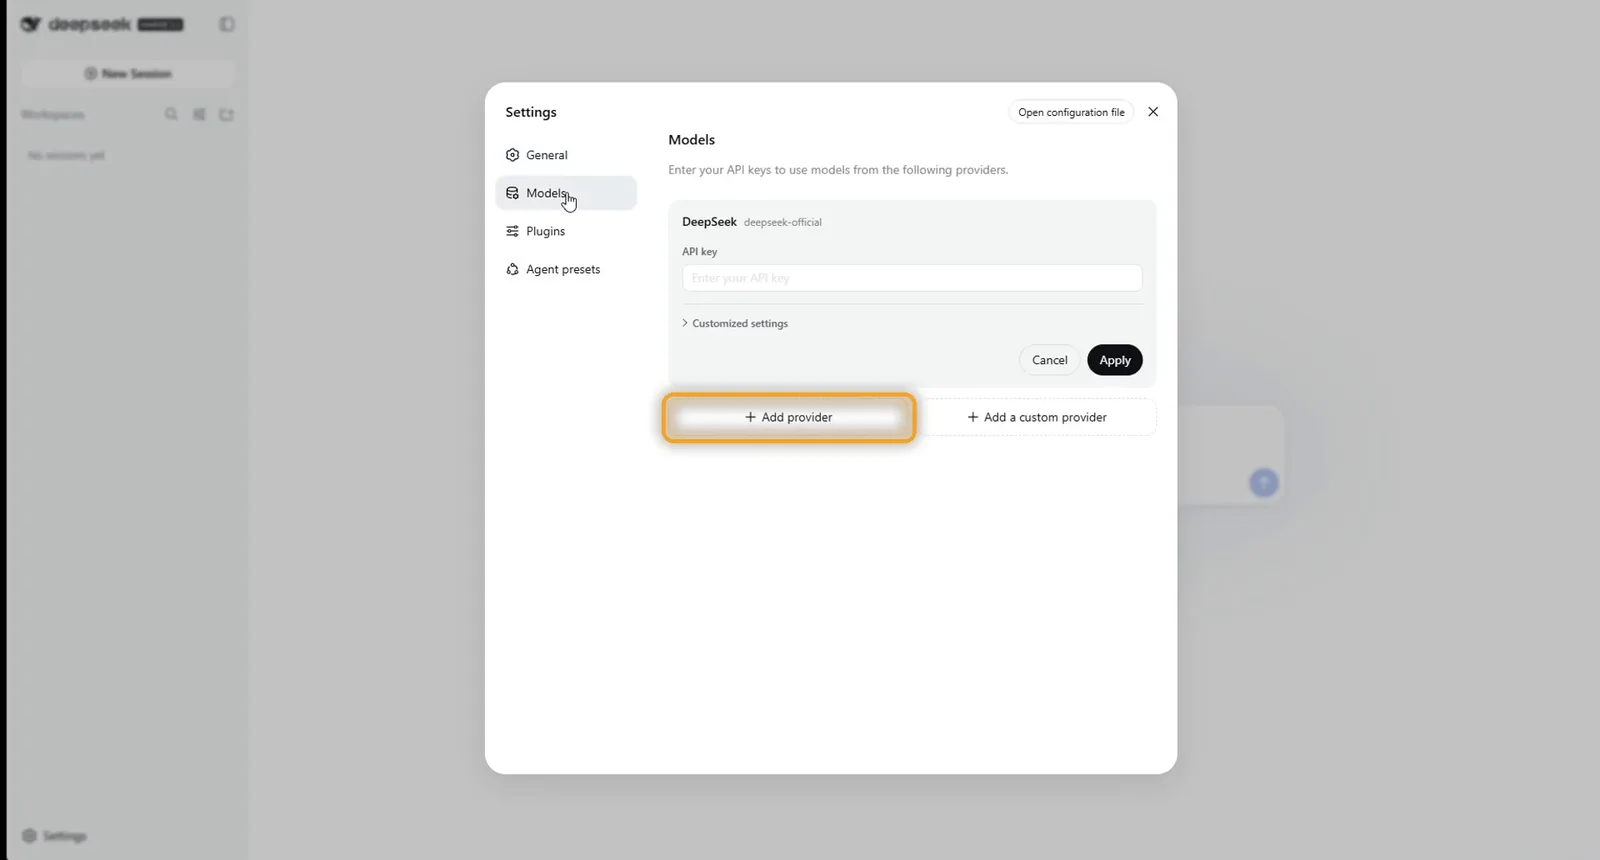
The list is long, so scroll down to openrouter and pick it.
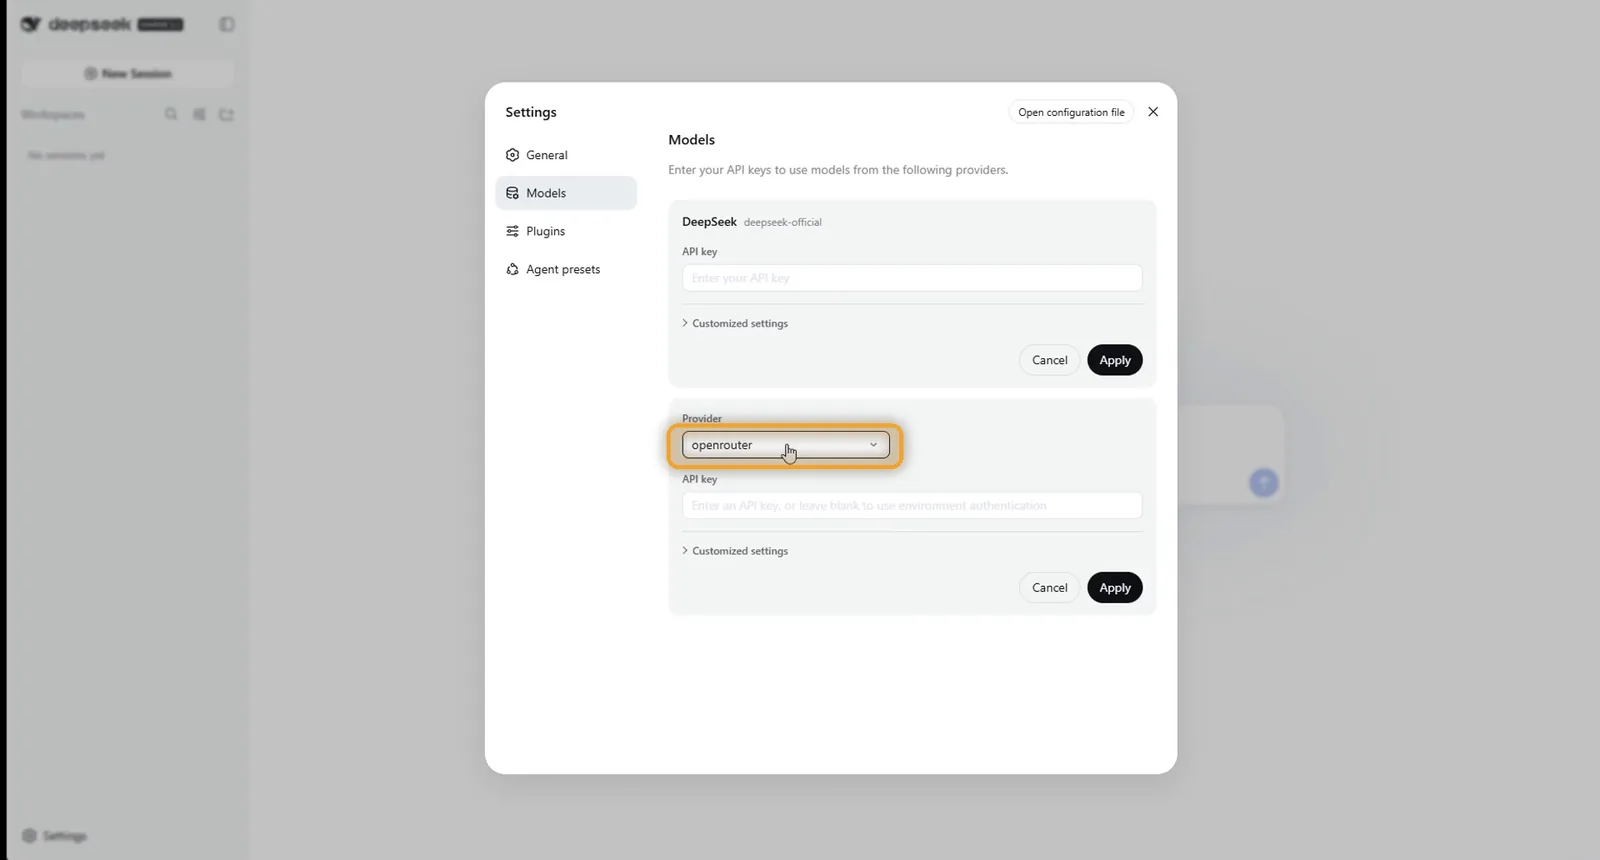
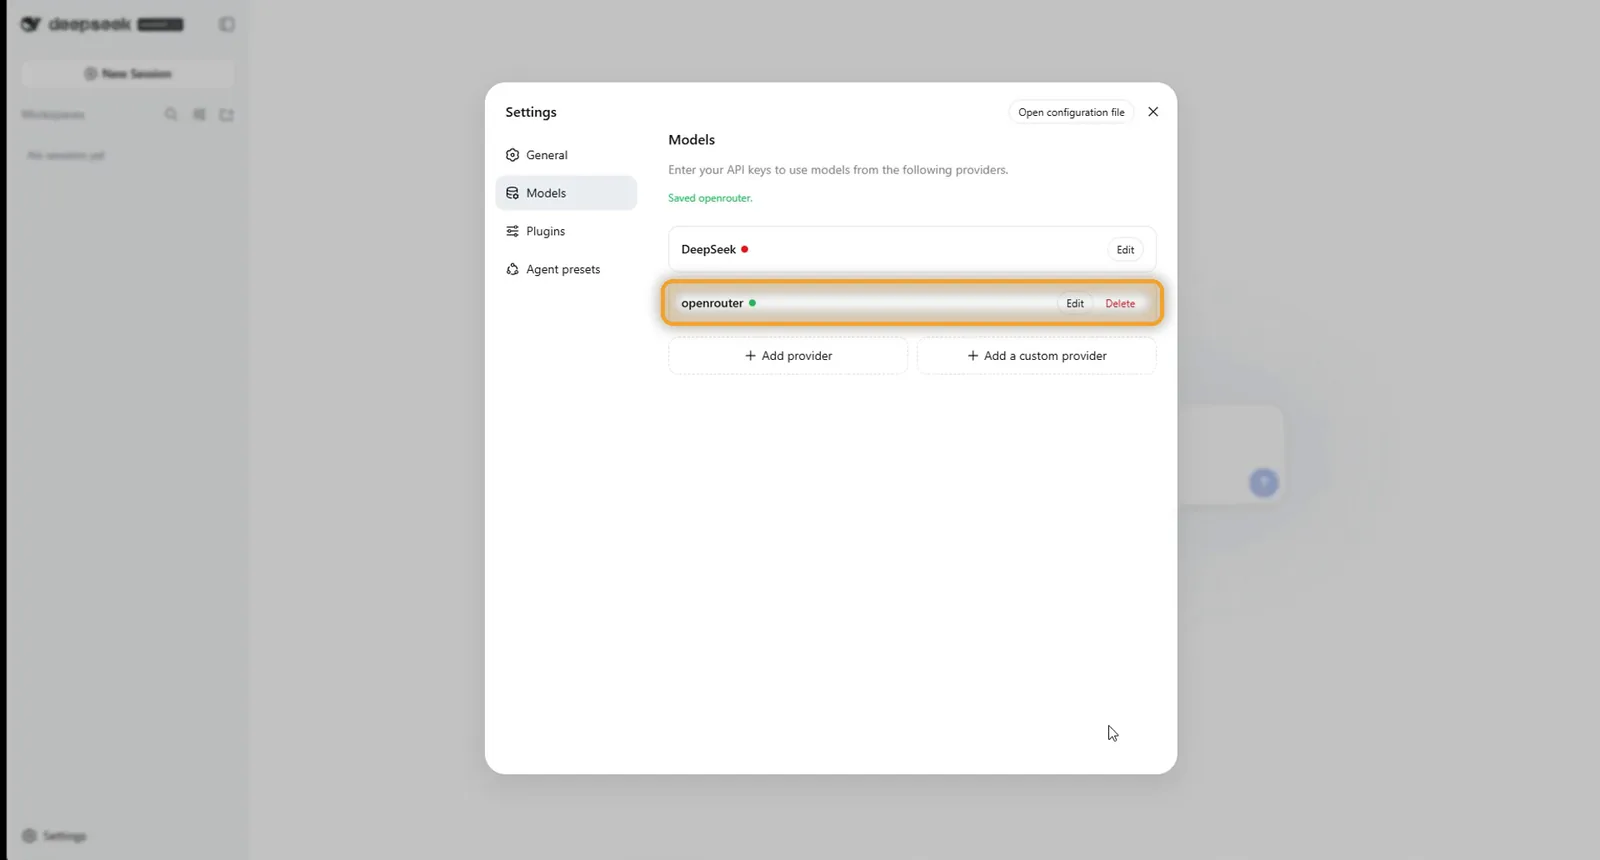
Paste your key, open Customized settings and click Fetch available models.
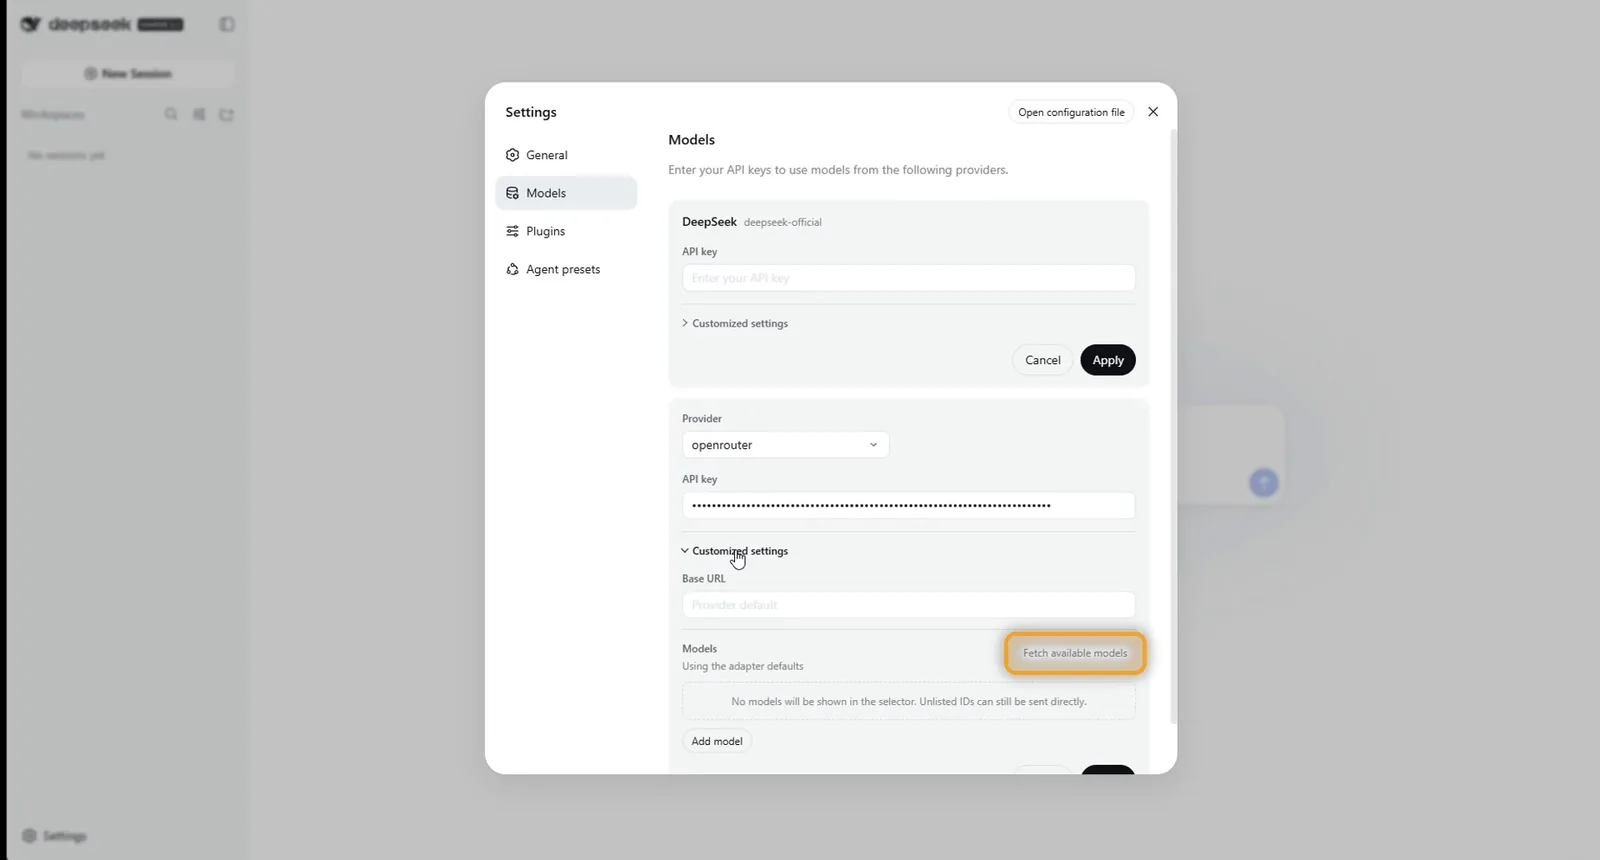
It lists the models this version of Harness knows about. Leave them all ticked and click Add selected. Then scroll to the bottom and click Apply.
A green dot next to openrouter means it’s saved. The red dot next to DeepSeek is the official provider with no key. You won’t use it.
Step 6: Pick a model and test it
To chat, Harness needs a workspace: a folder on its server that it’s allowed to work in. Click Add workspace next to Workspaces, then New folder, give it a name and open it.
Open the model picker in the chat box. Under openrouter, pick DeepSeek: DeepSeek V4 Flash. It’s fast and very cheap: a simple question costs less than a tenth of a cent.
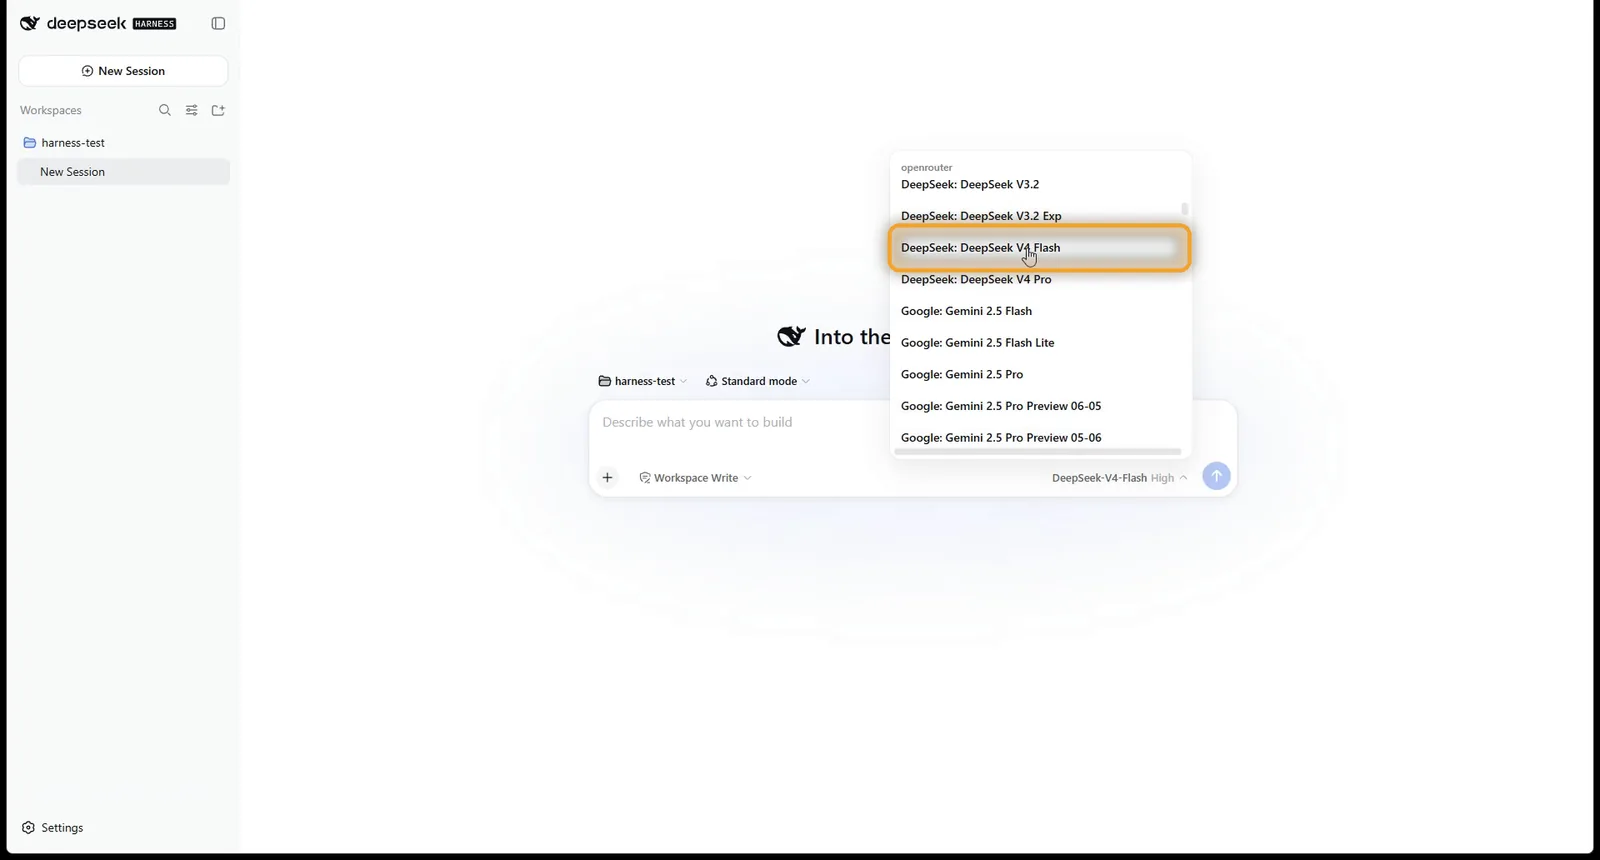
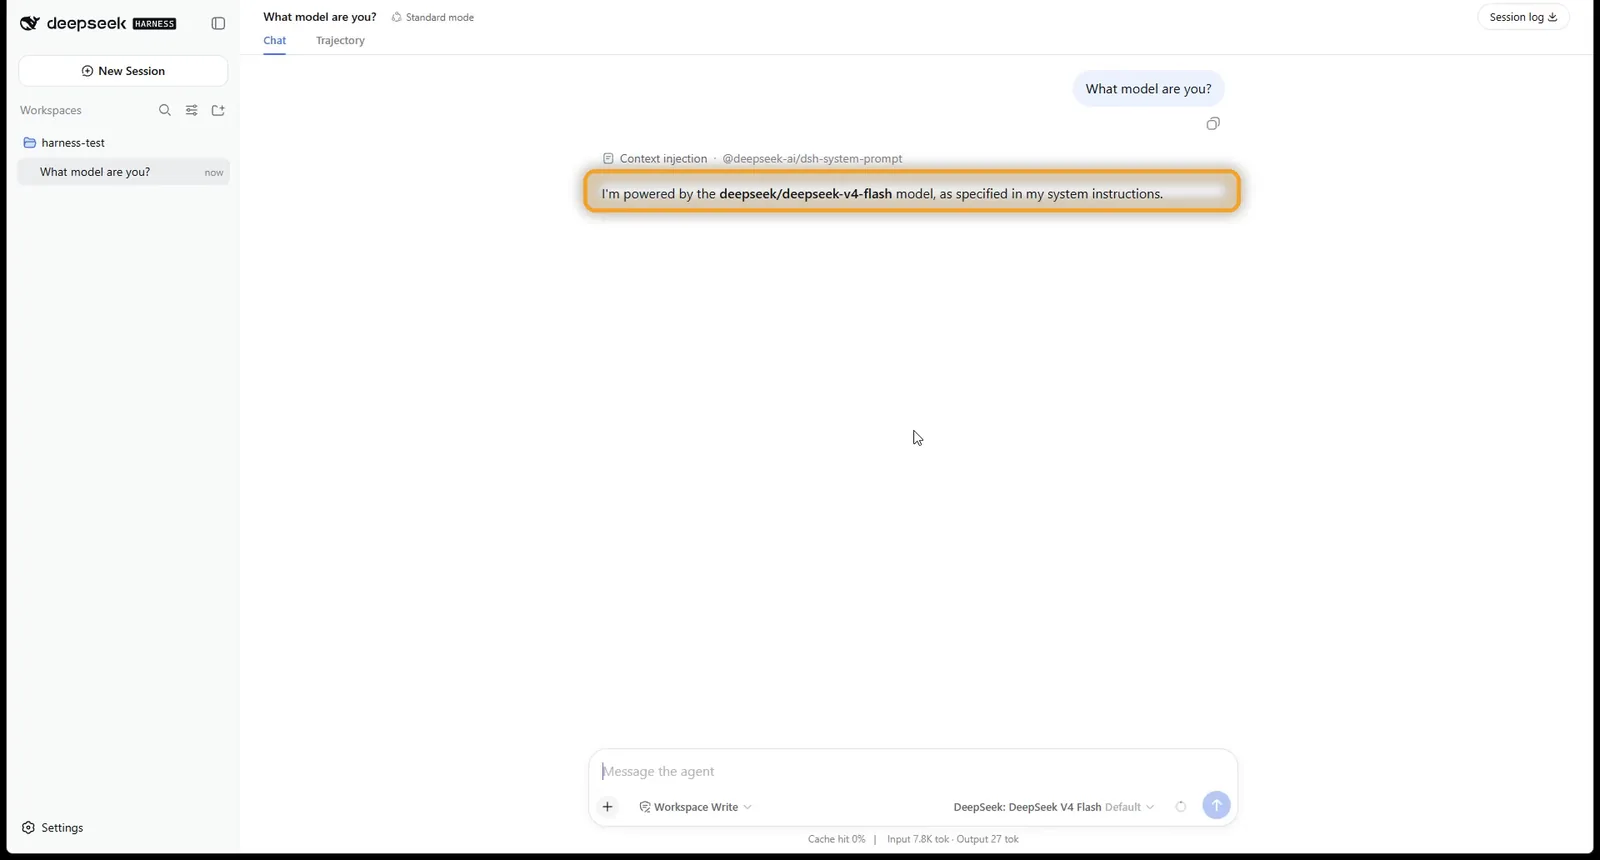
Now two quick tests. Type What model are you? It answers DeepSeek V4 Flash.
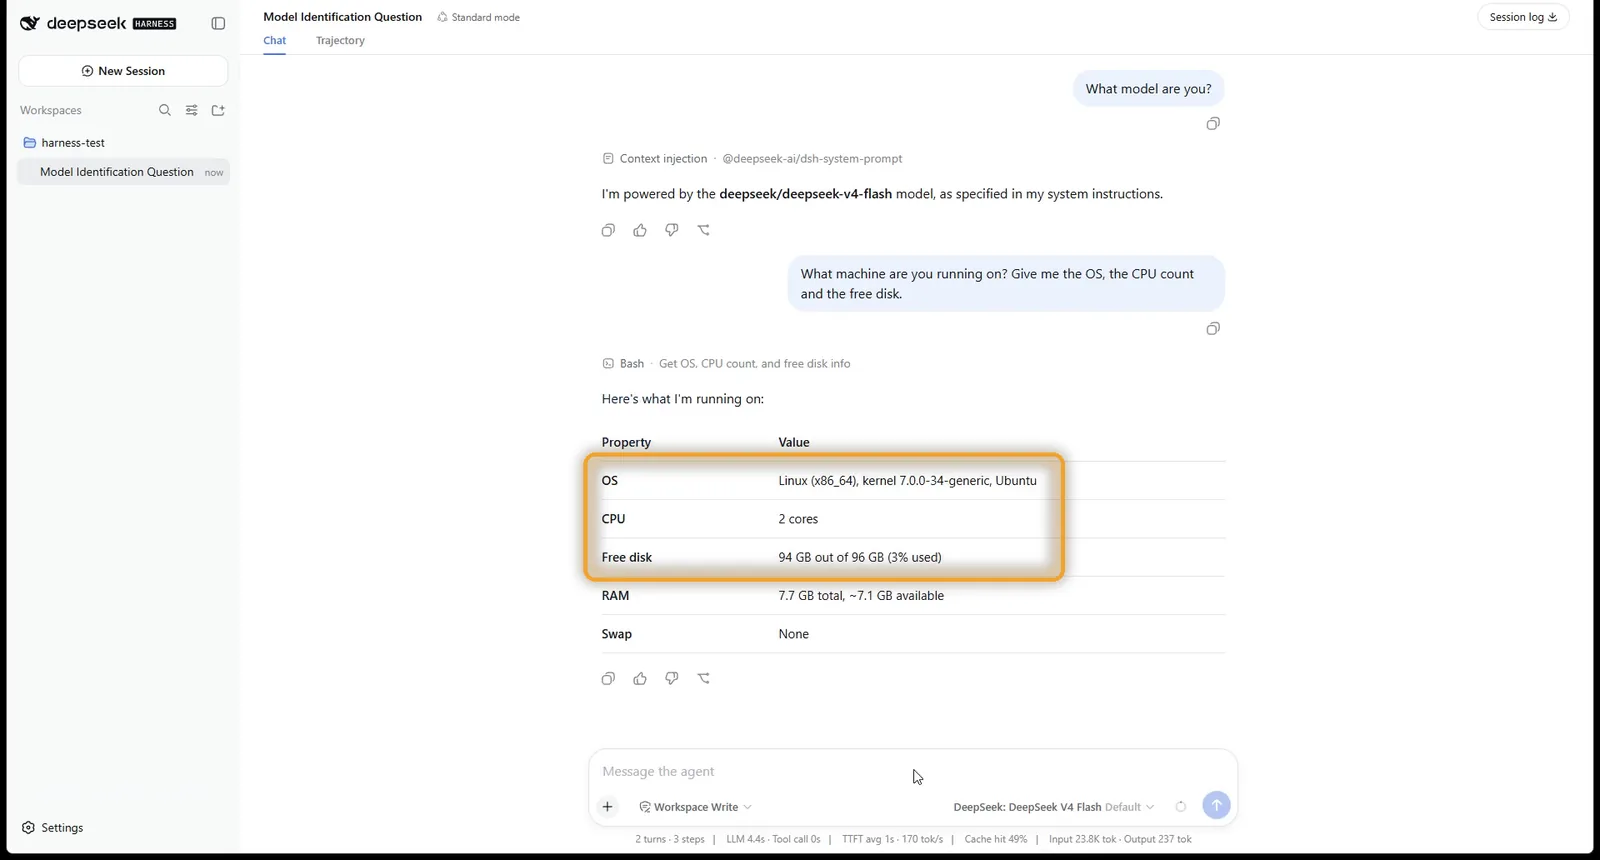
Then ask: What machine are you on? Give me the OS, the CPU count and the free disk. Watch as it runs the commands. Mine said Ubuntu Linux, 2 CPU cores and 94 GB free. That comes from your server, not your laptop.
Step 7: Add a model that Harness doesn’t list yet
DeepSeek released V4.1 Flash on 10 September 2026. It isn’t in the picker, because this version of Harness came out before it did. You don’t have to wait for an update.
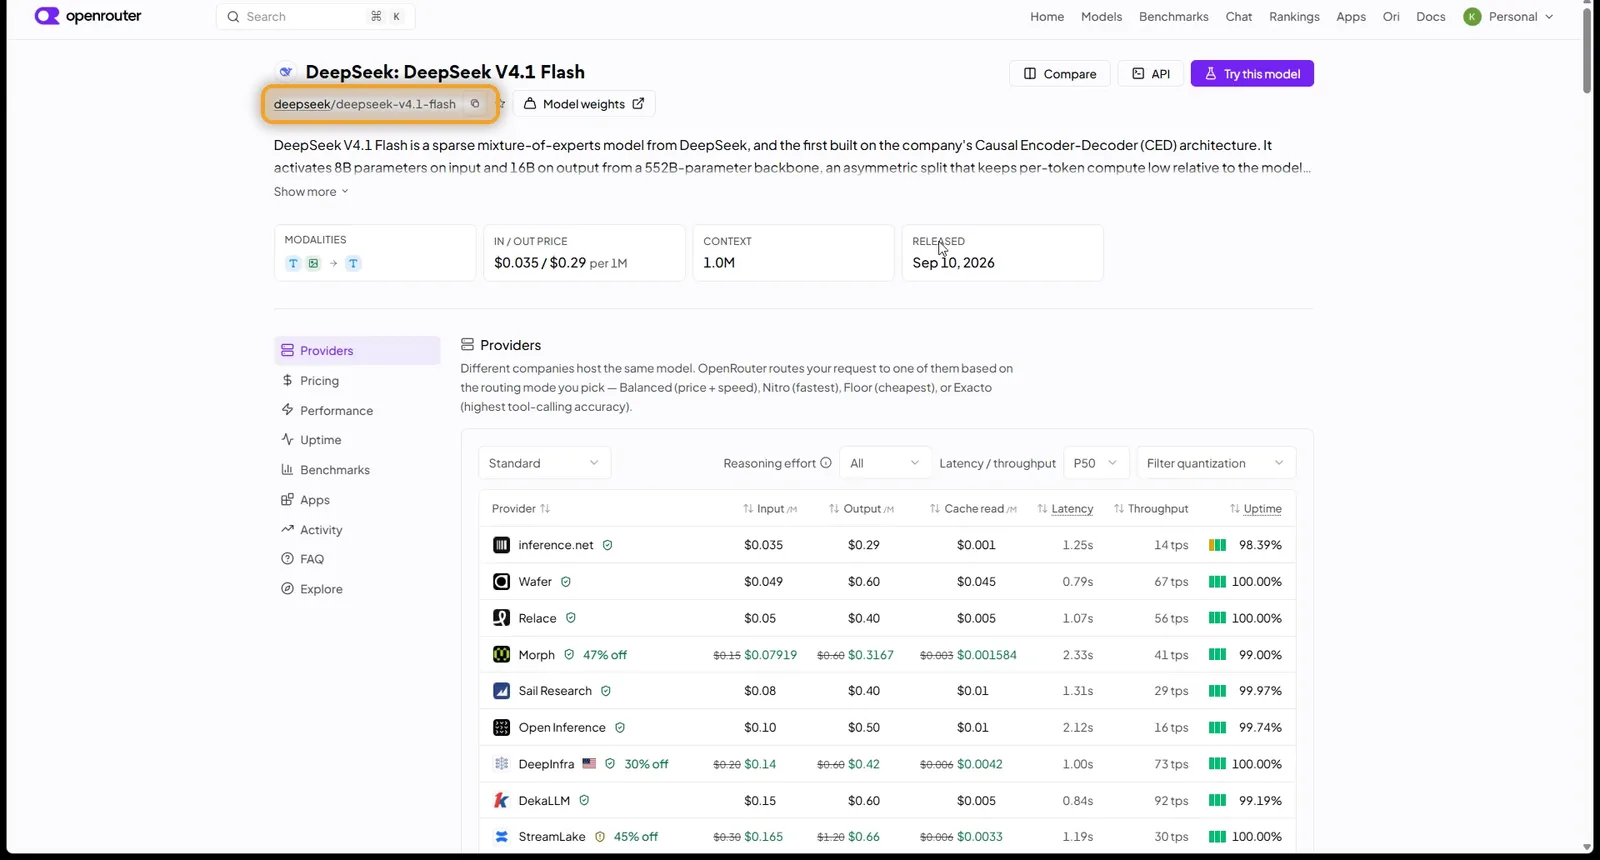
On OpenRouter, open the model’s page and copy its ID: the exact name with the slash in it. For this one it’s deepseek/deepseek-v4.1-flash.
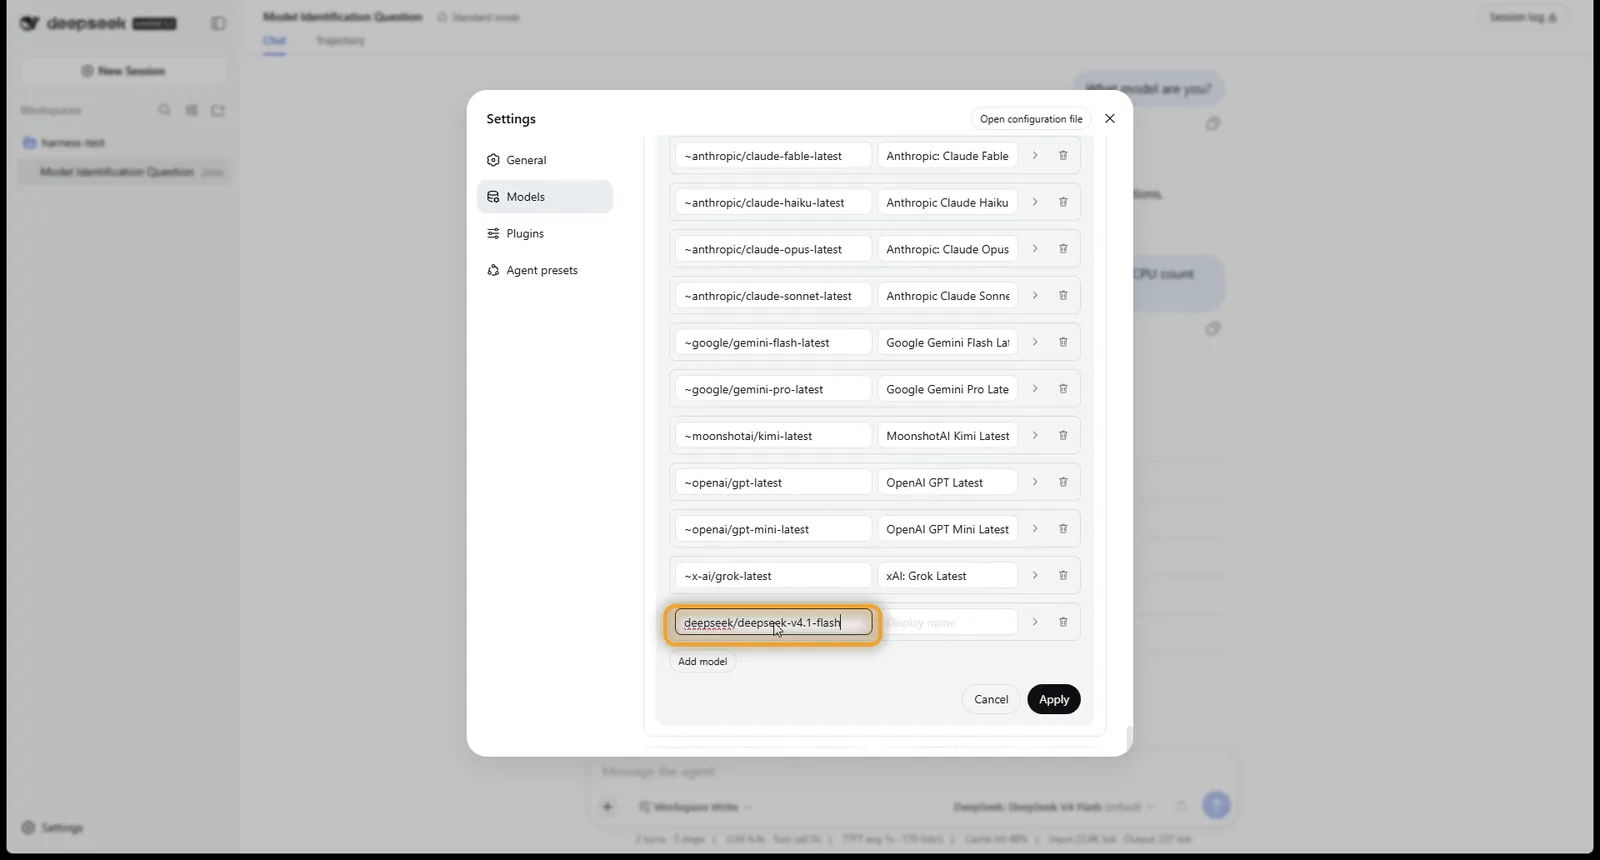
In Harness, go to Settings, then Models, and click Edit on openrouter. Under Customized settings, click Add model. Paste the ID, give it a name and click Apply.
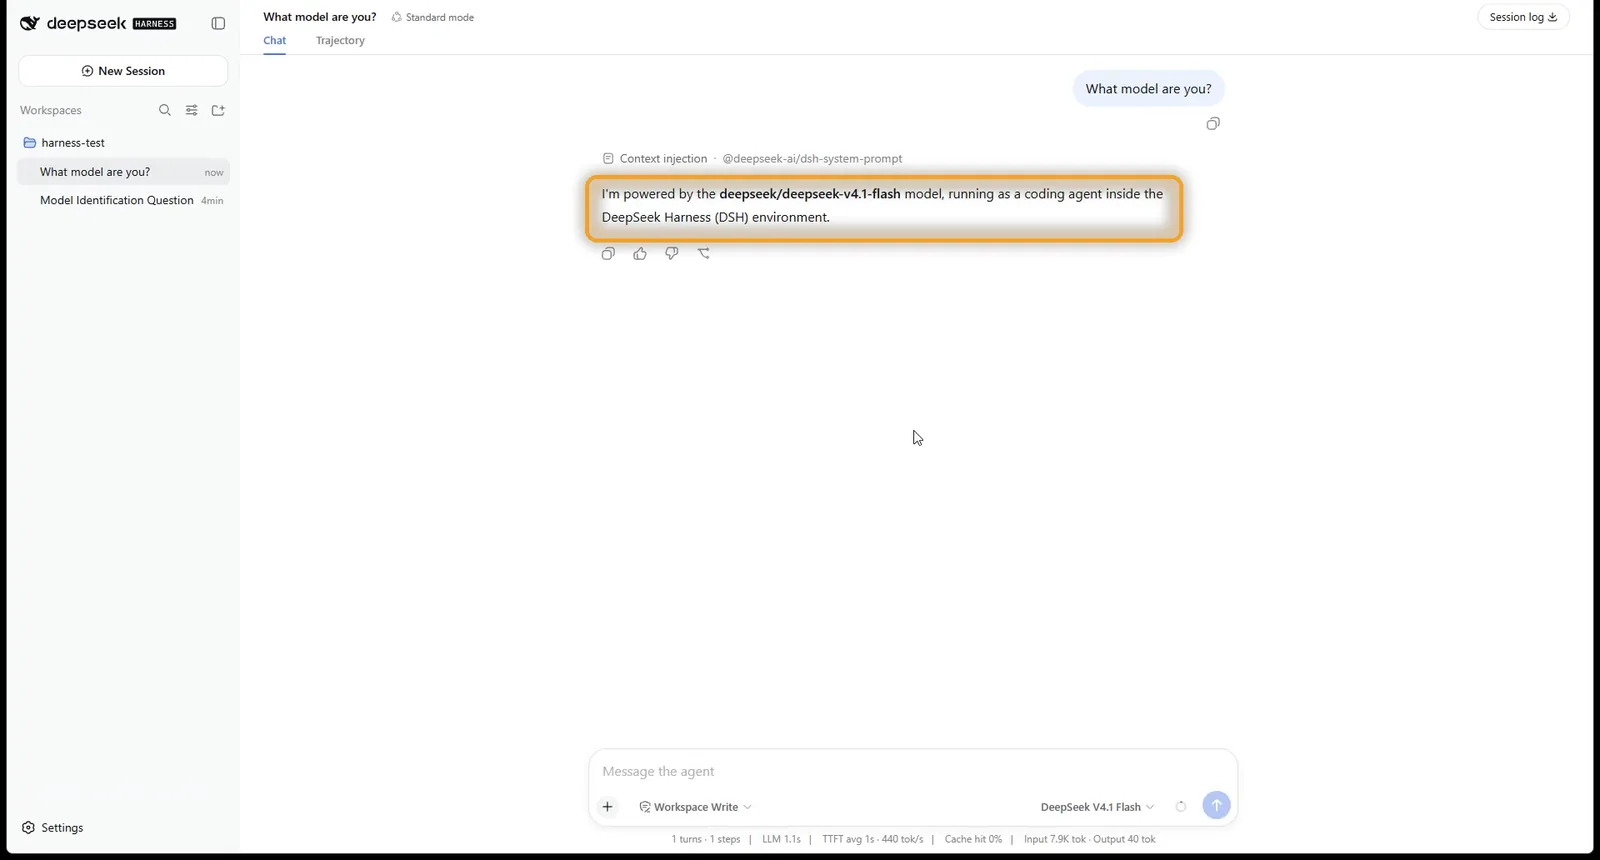
Back in the picker, there it is. Click New Session, ask “What model are you?” again, and it answers as V4.1 Flash. This works for any model on OpenRouter, the day it launches.
Step 8: Have Harness build and publish a website
Now give it a real job. Add a new workspace. I called mine landing-page.
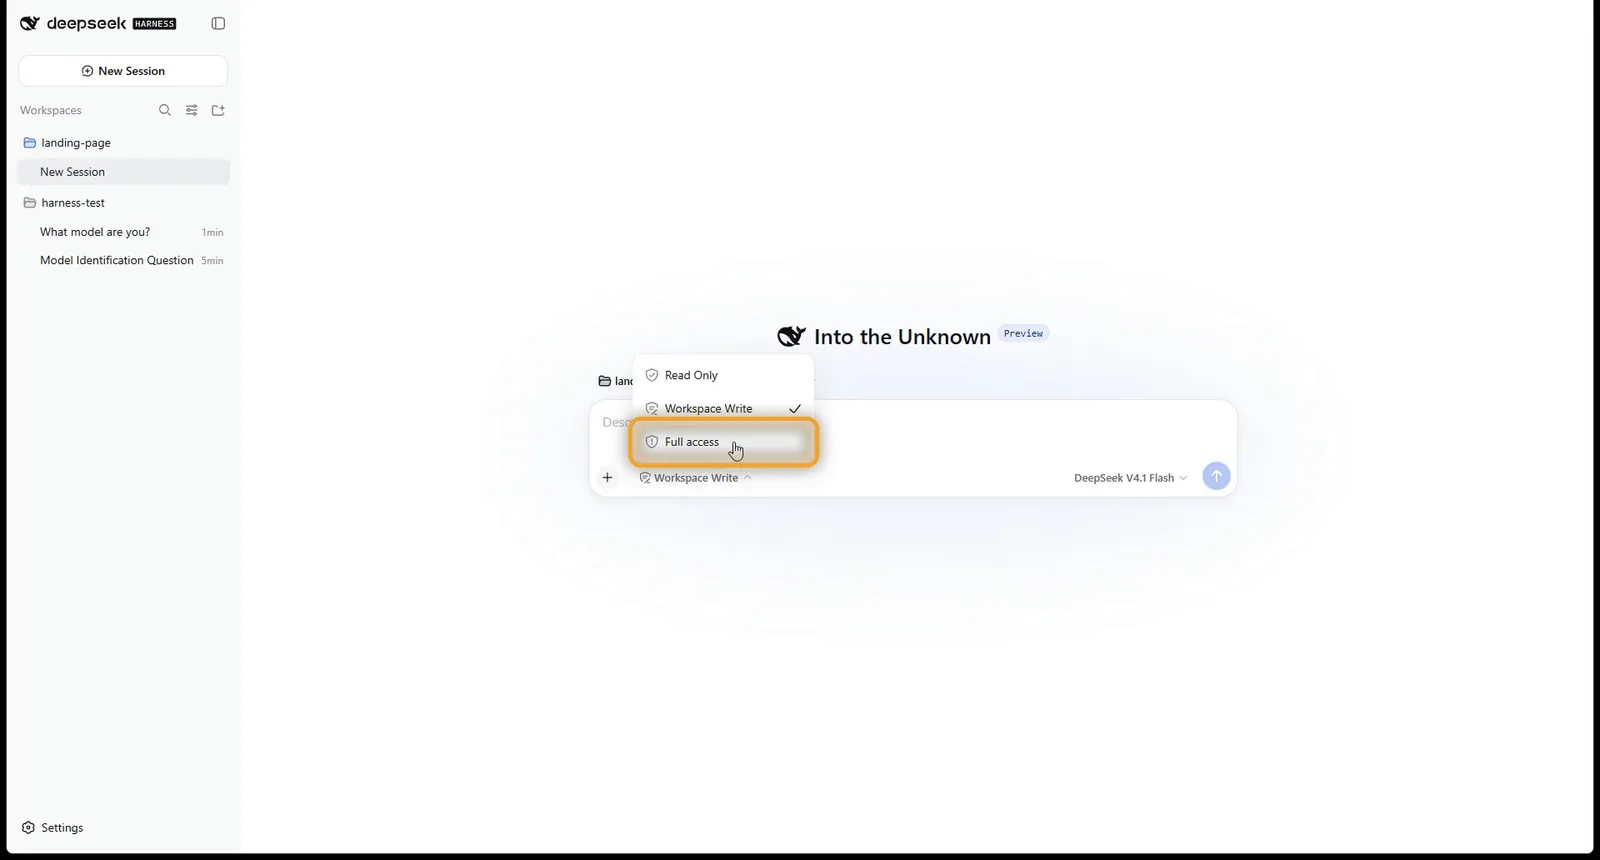
Set the permission to Full access, so it can build without asking you before every step. Harness warns you first: tick the box, then click Enable Full access.
Then paste this prompt:
Build me a one-page landing page for an automation consultancy called Torrington Automation, in a clean modern style: a hero, three services, a short about section, a contact form and a footer. Then serve it on this server at a URL I can open in my browser.
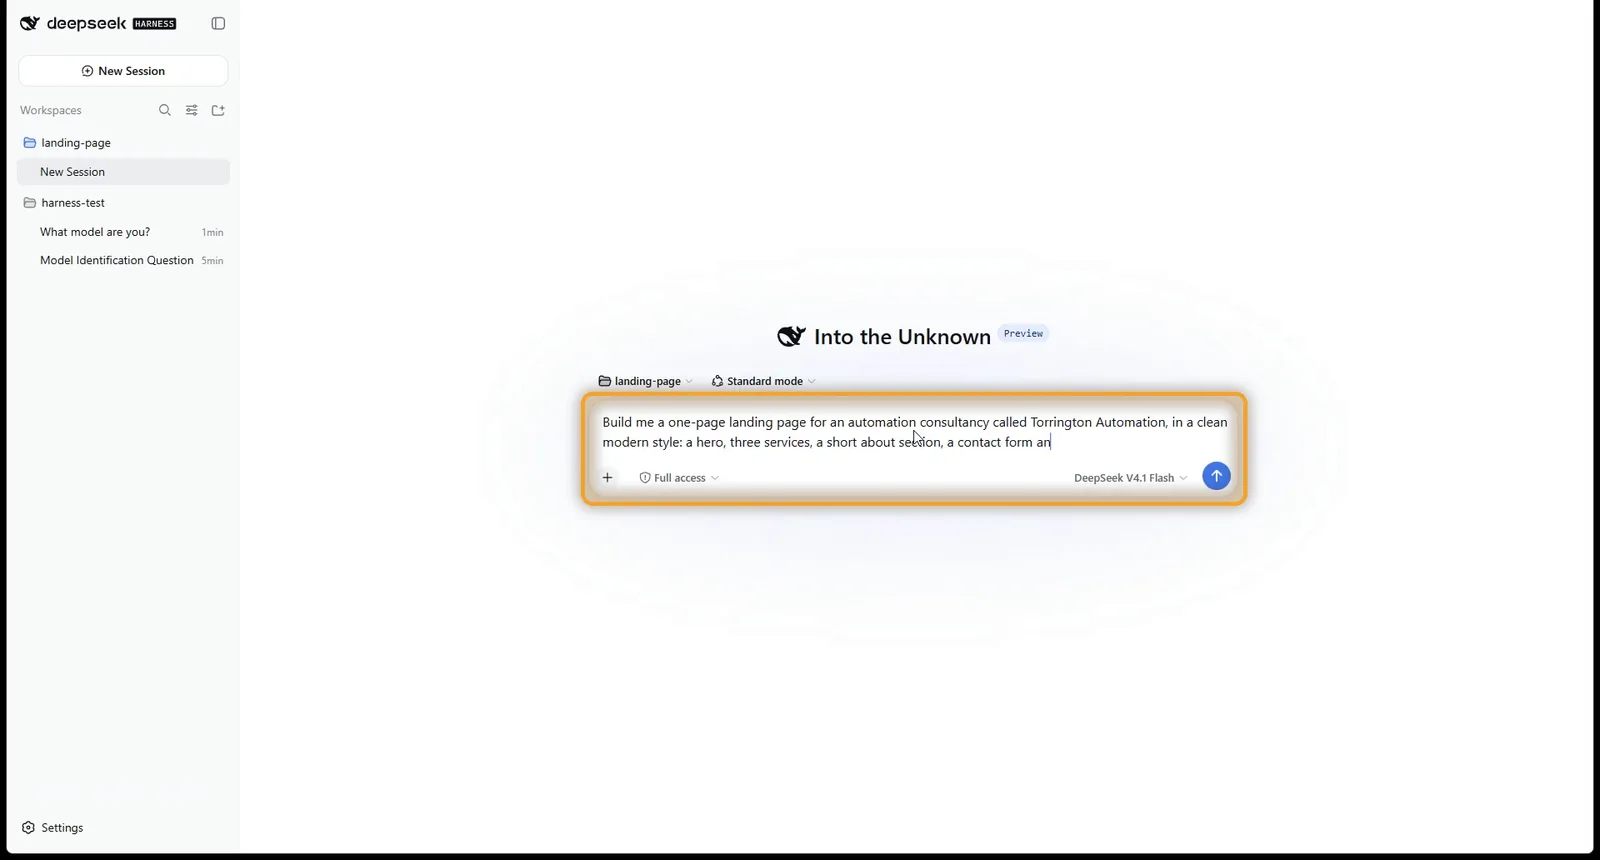
Send it. It writes itself a to-do list, builds the page and puts it online. Open the Trajectory tab to see every file it wrote and every command it ran. Nothing is hidden.
About a minute later it’s done, and it has even tested its own contact form.
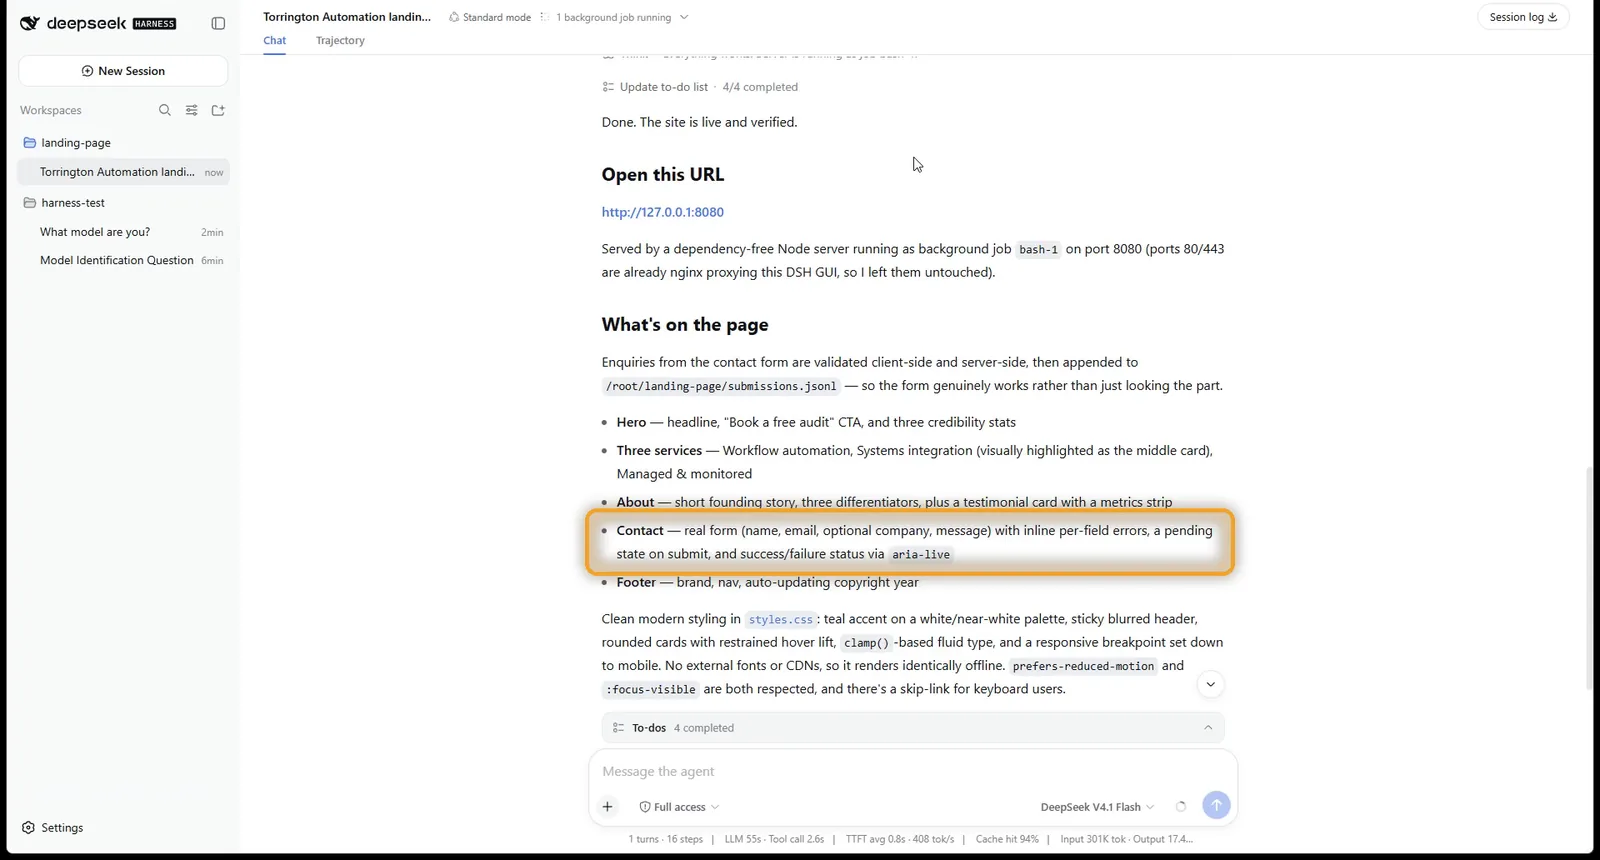
It gives you a local link, but that only works on the server itself. On your laptop, type http://, then your server’s name from the VPS dashboard, then :8080. Use http, not https.
There’s the site, live on your server from one prompt. The text is a placeholder it made up, so you’d swap in your own. And the form works.
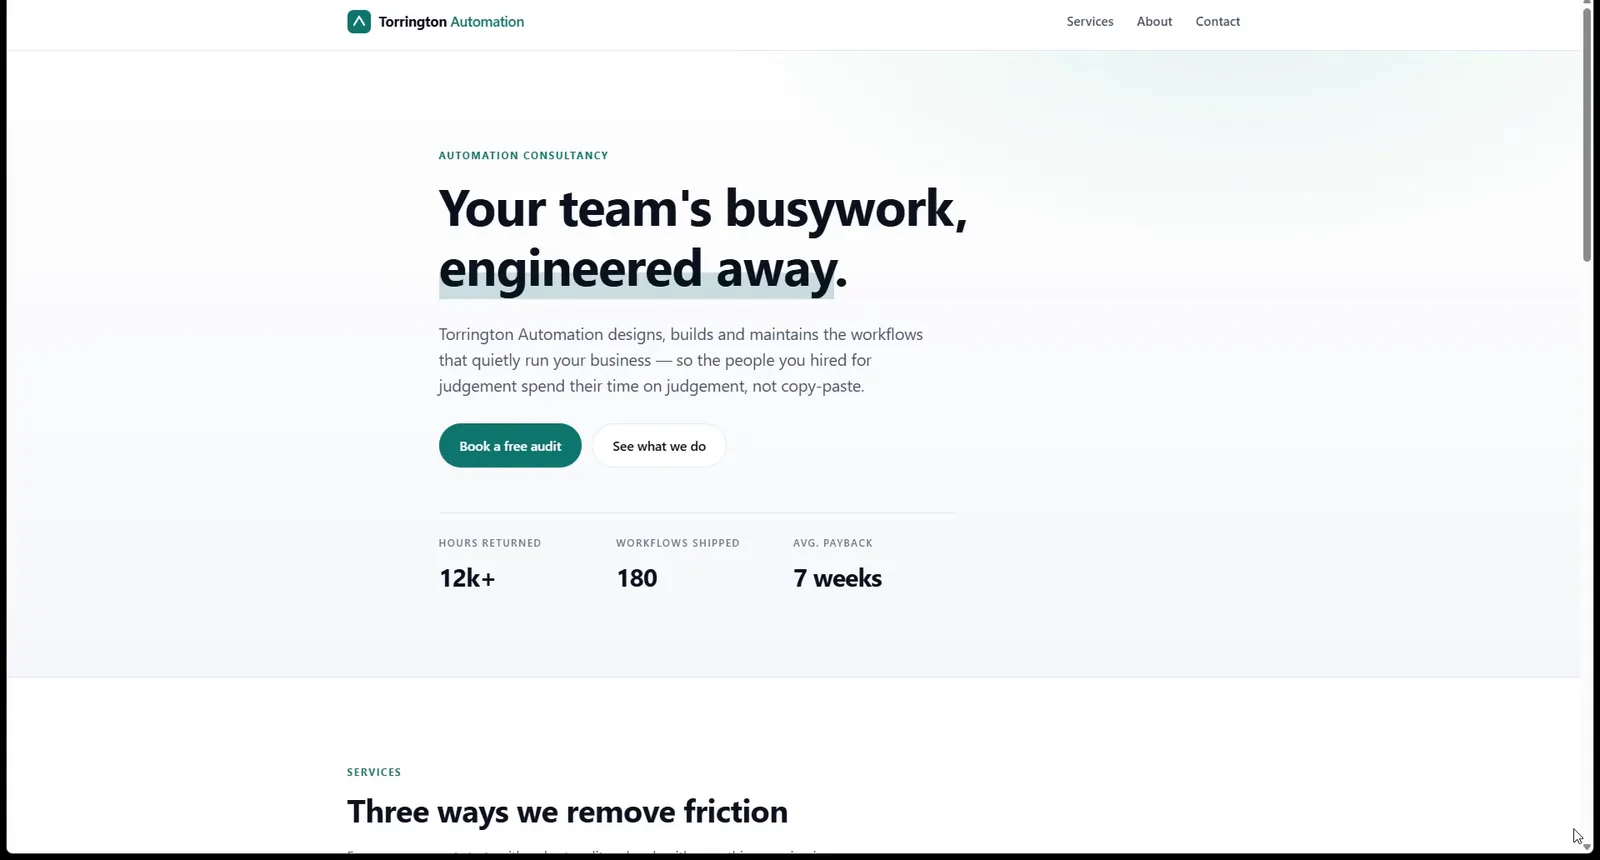
The site keeps running until Harness restarts. To keep it up for good, ask Harness to keep it running permanently.
What DeepSeek Harness on Hostinger costs
| Item | Cost |
|---|---|
| Hostinger KVM 2, 24-month plan | US$8.99 a month (A$13.09 in Australia), renews at US$14.99 |
| OpenRouter, DeepSeek V4 Flash | US$0.14 per million tokens in, US$0.28 out |
| Everything the AI did in this guide | About 3 cents |
| DeepSeek Harness | Free and open source |
The one rule: keep it locked down
That sign-in box is the only thing between the internet and an agent that can run commands on your server. Keep the address and the password to yourself, and only switch on full access when you need it. Anything it puts online, like that website, is public, so treat it as a demo.
Is Hostinger right for you?
What I like
- The template installs Harness for you. The only command you type is the 502 fix.
- It runs 24/7, even with your laptop closed.
- KVM 2 has room for the agent and whatever it builds.
- There’s a 30-day money-back guarantee.
What to watch out for
- Right now the template gives the 502 error until you run the fix.
- The low monthly price means paying 12 or 24 months upfront, and it renews at a higher price.
- Harness itself is still in testing.
- The site it builds runs on http and port 8080, not a proper https web address.
Skip it if
You only want to chat with an AI now and then. DeepSeek’s own app does that for free. And if you already rent a server, you can install Harness on that instead.
FAQ
Is DeepSeek Harness free?
Yes. Harness is free and open source. You pay for the server and for what the AI uses, which was about three cents for everything in this guide.
Why does DeepSeek Harness show 502 Bad Gateway on Hostinger?
Hostinger’s template currently installs Harness 0.1.1-rc.2, which doesn’t start after a recent update to some of its parts. The one-line fix repairs it in about 15 seconds.
Which Hostinger plan do I need?
I used KVM 2 (2 CPU cores, 8 GB of memory) and it had plenty of room. I haven’t tested the smaller KVM 1.
Do I need a DeepSeek API key?
No. An OpenRouter key works instead, and it gives you DeepSeek’s models plus hundreds of others. If you already have a DeepSeek key, paste it in when Harness asks.
Does it keep running when my computer is off?
Yes. Harness runs on your Hostinger server, not your computer, so it keeps going with your laptop closed.
Get everything I used, free
The 502 fix line, the website prompt and a setup checklist are free in my Automation Vault, so you don’t have to copy anything from this page. Every new build from my channel lands there the day the video goes live.
Want another agent on the same kind of server? This video shows you Hermes.
Model prices: OpenRouter’s DeepSeek V4 Flash page.